How to Run Paper-Based Exams on BanglaTech
Create CQ (সৃজনশীল) questions, have students upload handwritten answers, then annotate and grade them part-by-part — a full digital workflow for paper-based exams.
Overview
BanglaTech lets you run paper-based exams end-to-end digitally. Students write their answers on paper, upload photos of their handwriting, and you (the teacher) annotate the images, enter part-wise marks, add feedback, and publish the result — all inside one interface.
This walkthrough uses a real সৃজনশীল প্রশ্ন (CQ) exam with two questions, and follows the complete flow:
- Admin creates a group and CQ questions
- Admin creates and activates the quiz
- Student joins the group, takes the exam, uploads handwritten answers
- Teacher grades the submission (annotate + part-wise marks + comment)
- Student sees the published result with annotations and breakdown
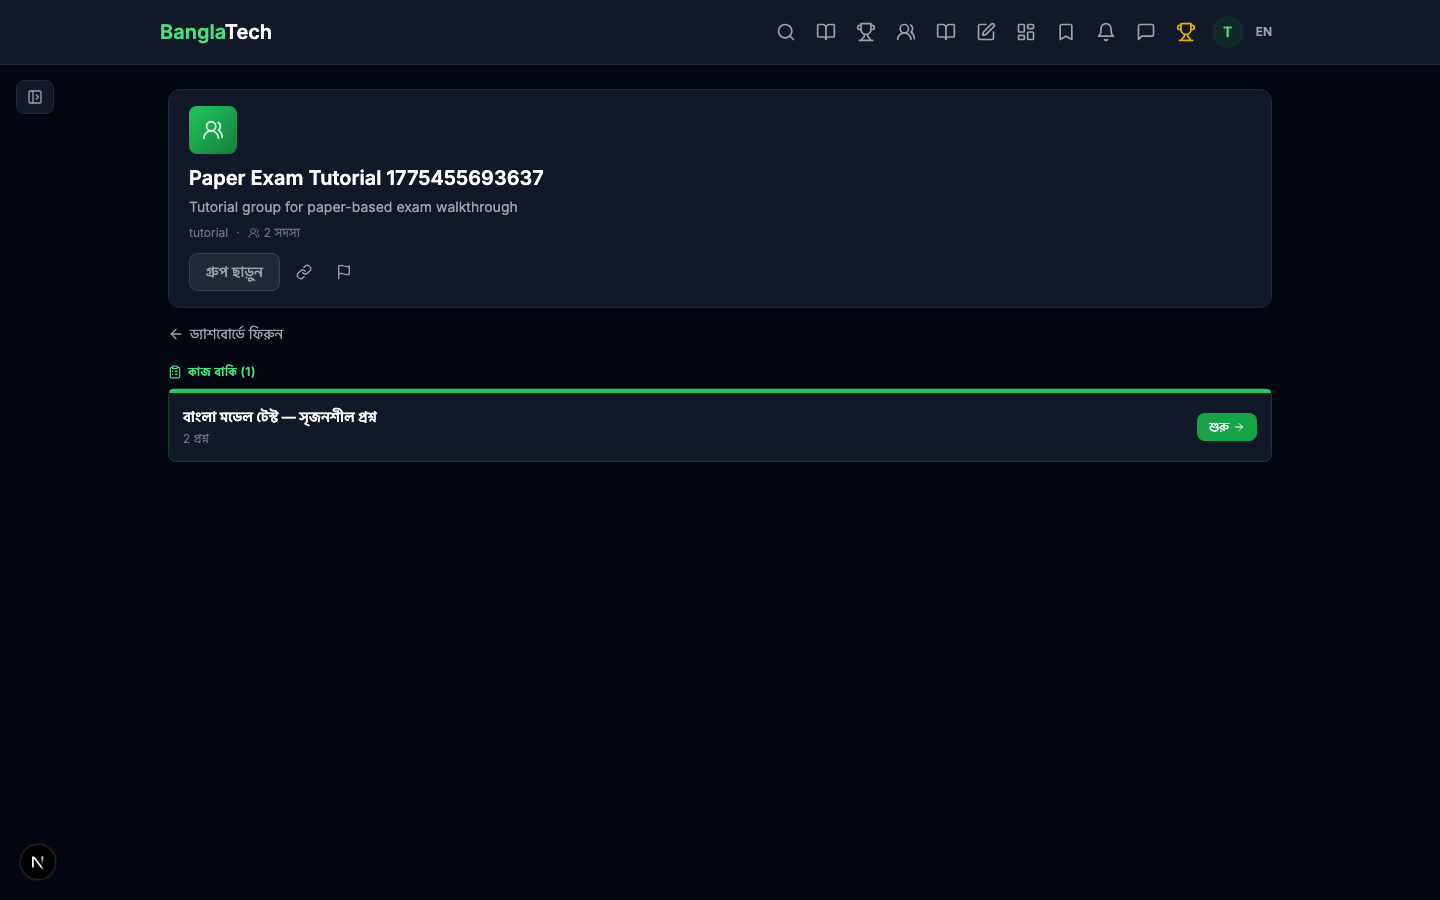
Part 1 — Admin: Create a Group
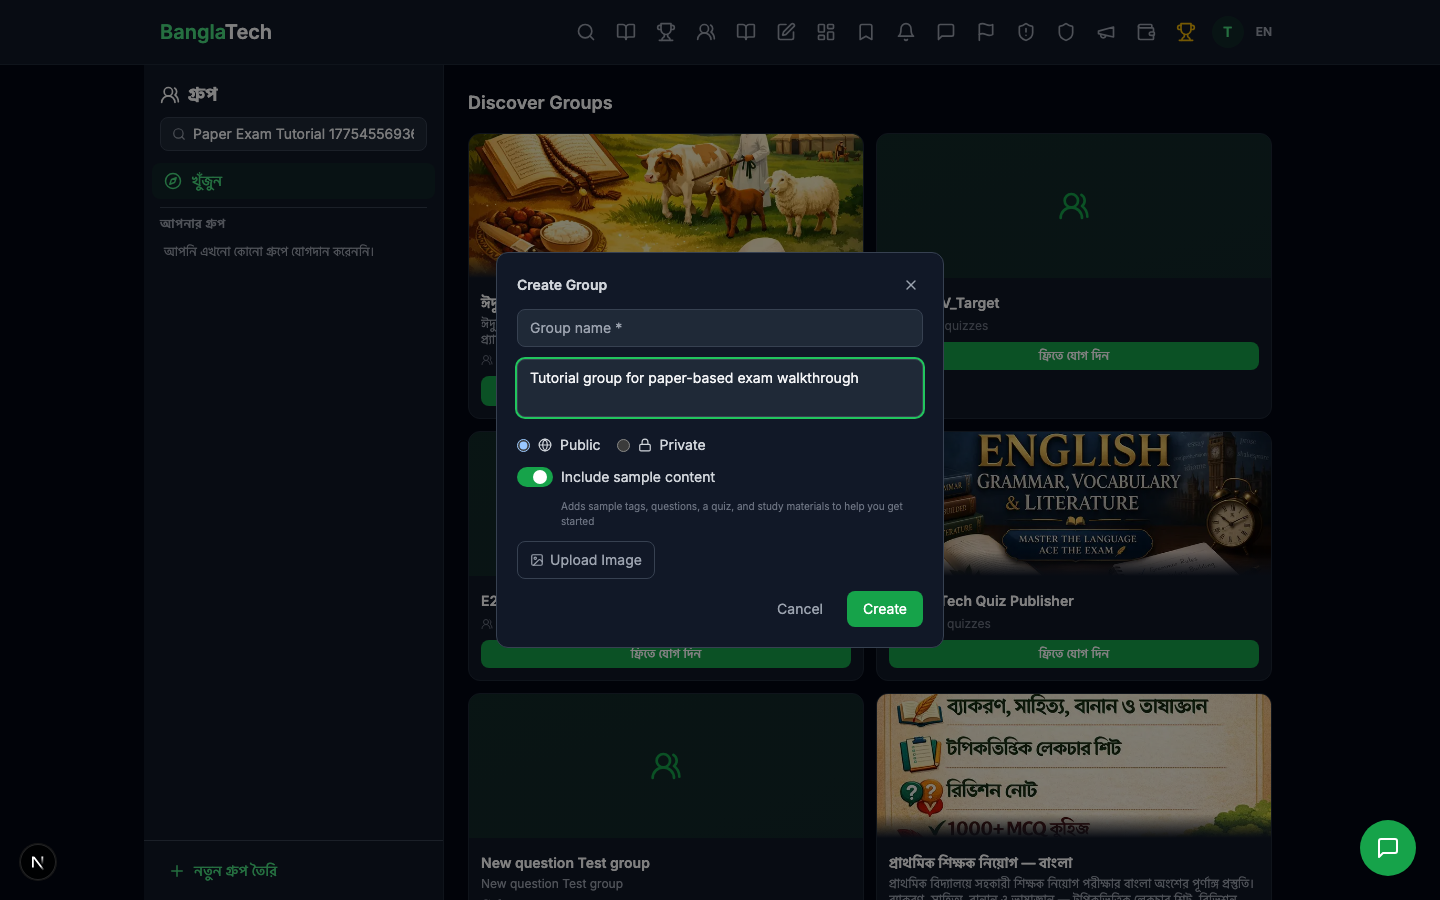
Sign in as an admin and head to the Groups page. Click Create Group.
Fill in a group name and description, then click Create.
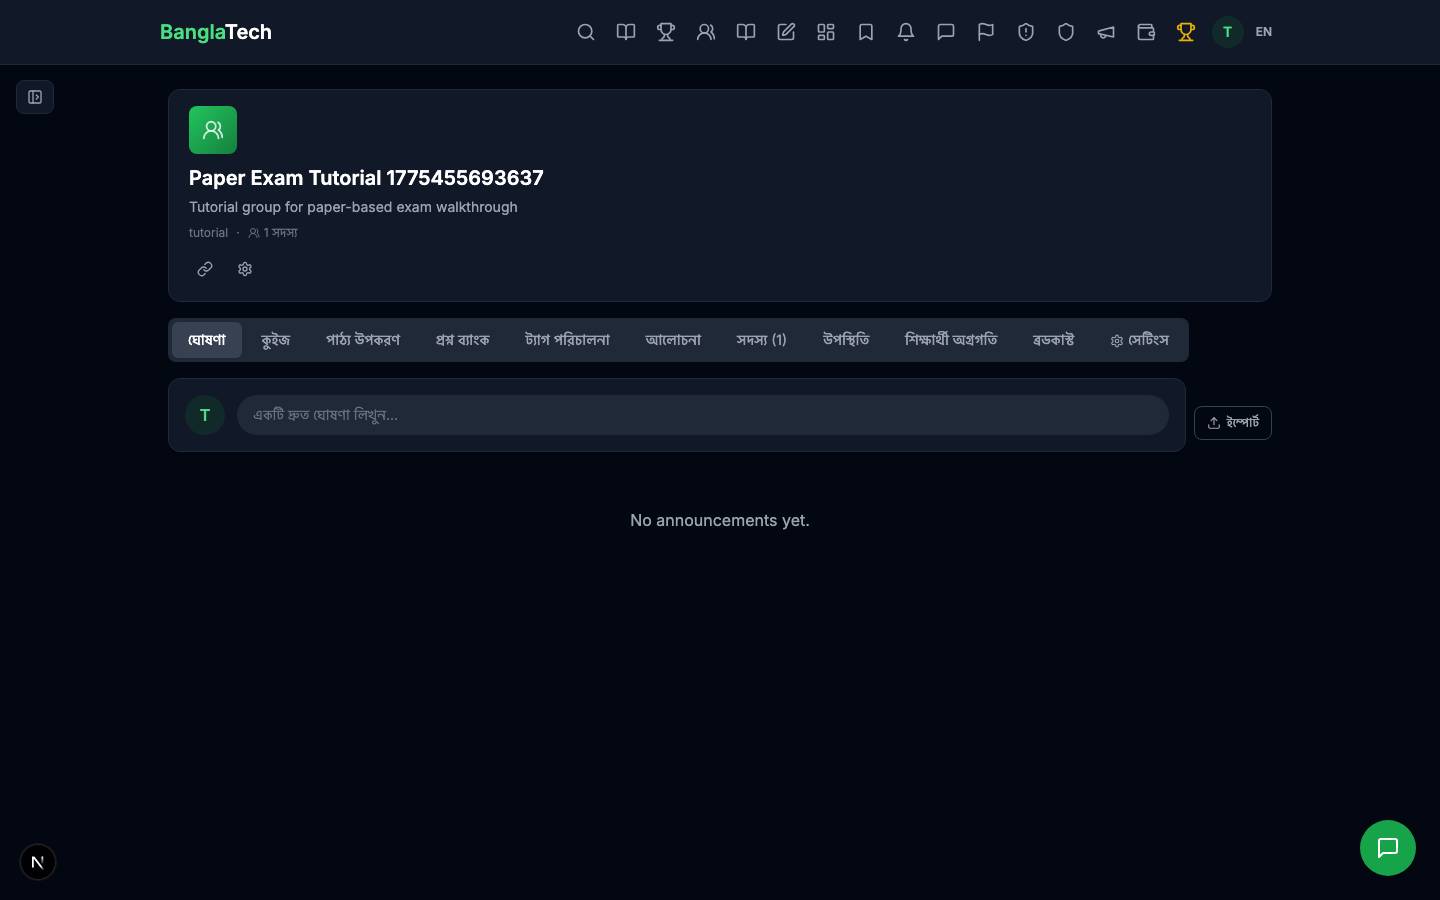
Your new group is ready. You'll land on the group home page.
Part 2 — Create the Quiz
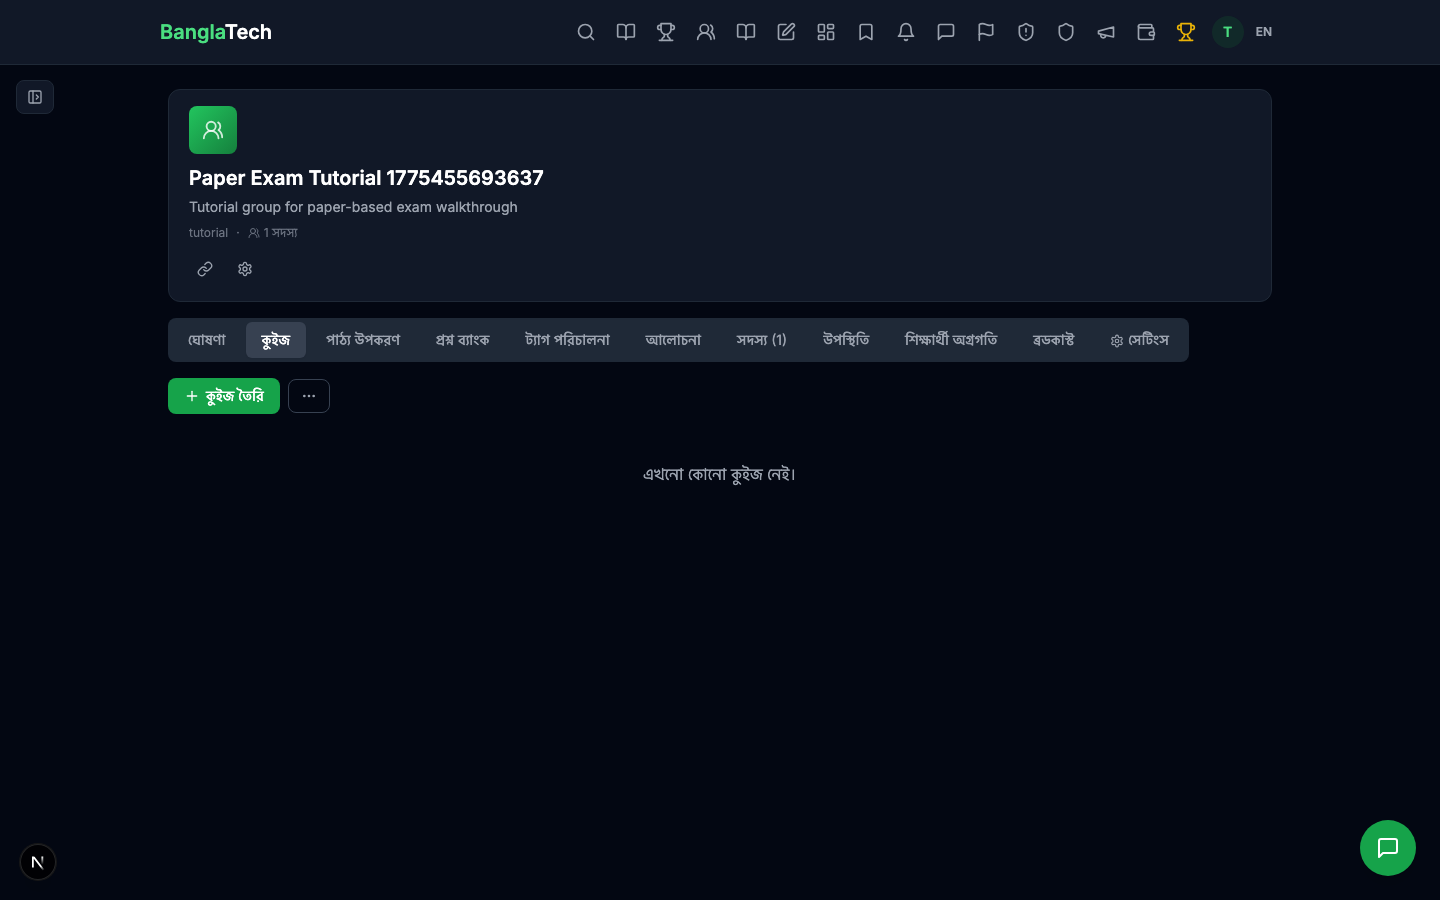
From the group, go to the Quizzes tab. It will be empty for a new group.
Click Create Quiz. Give your exam a title and description.
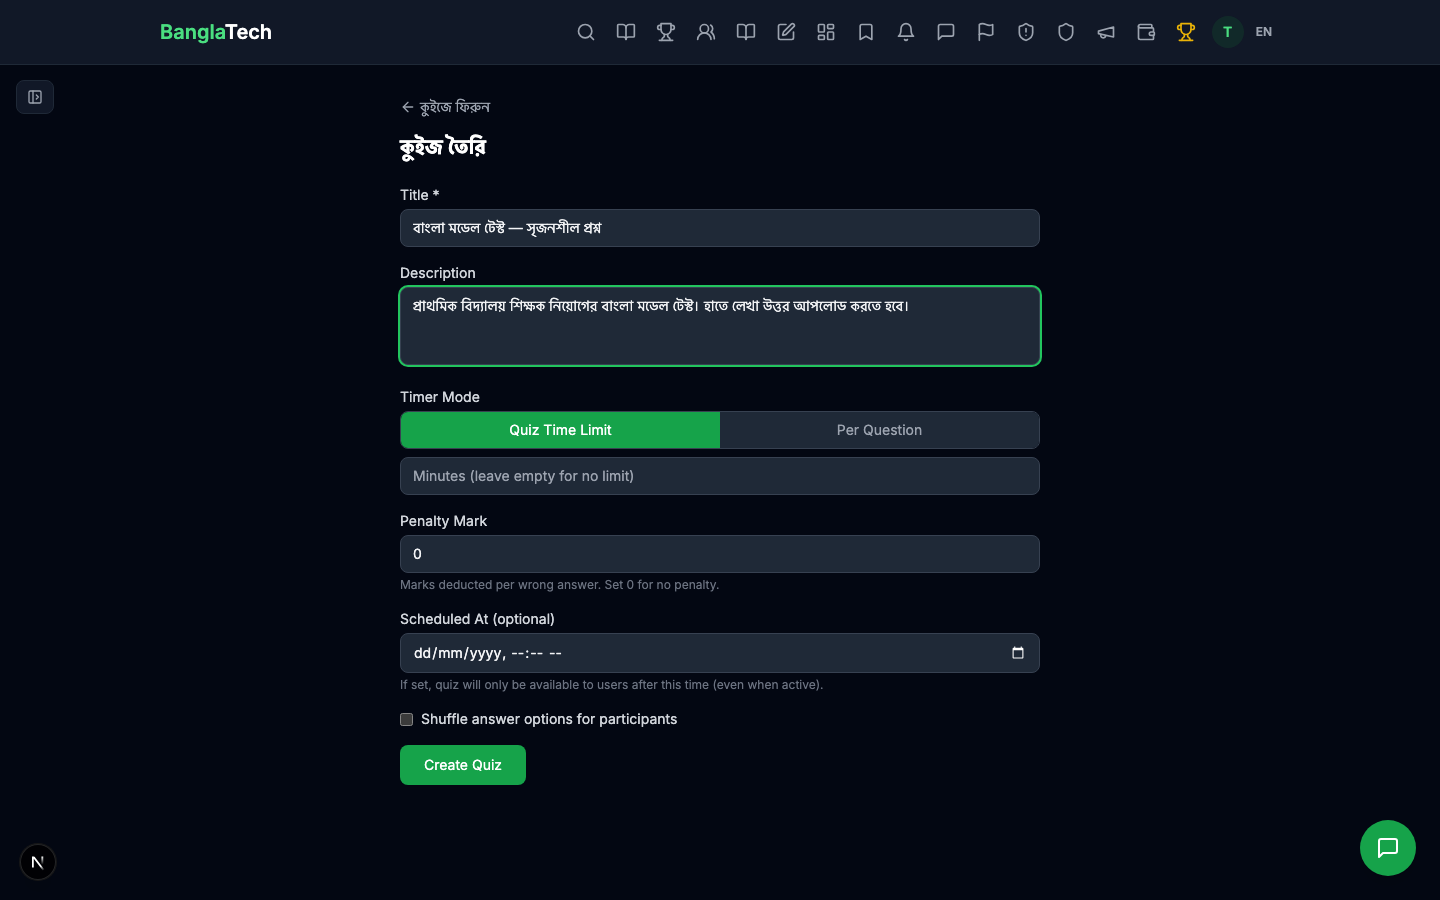
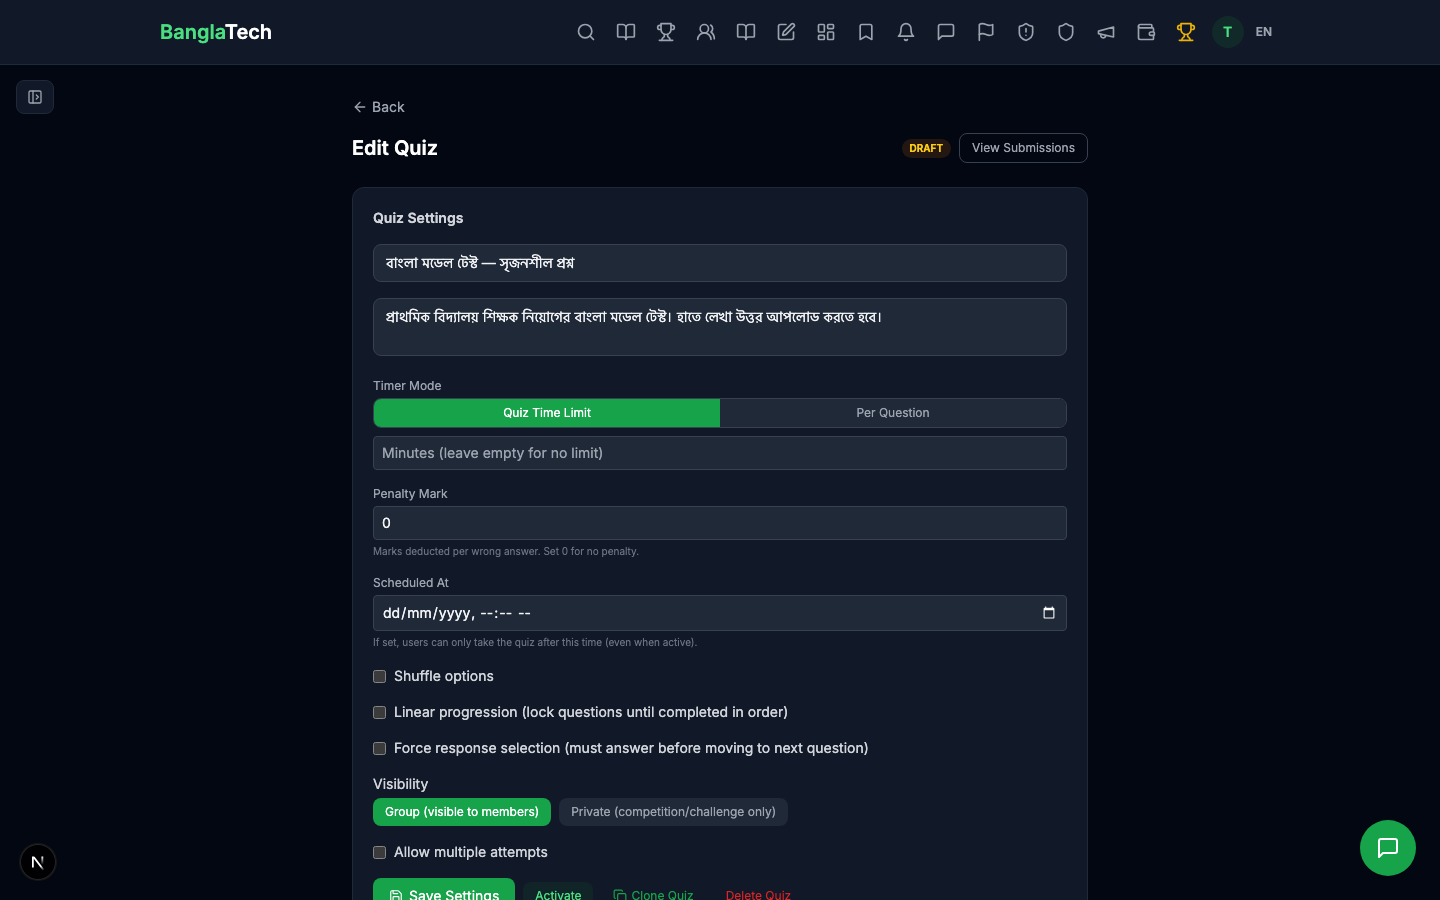
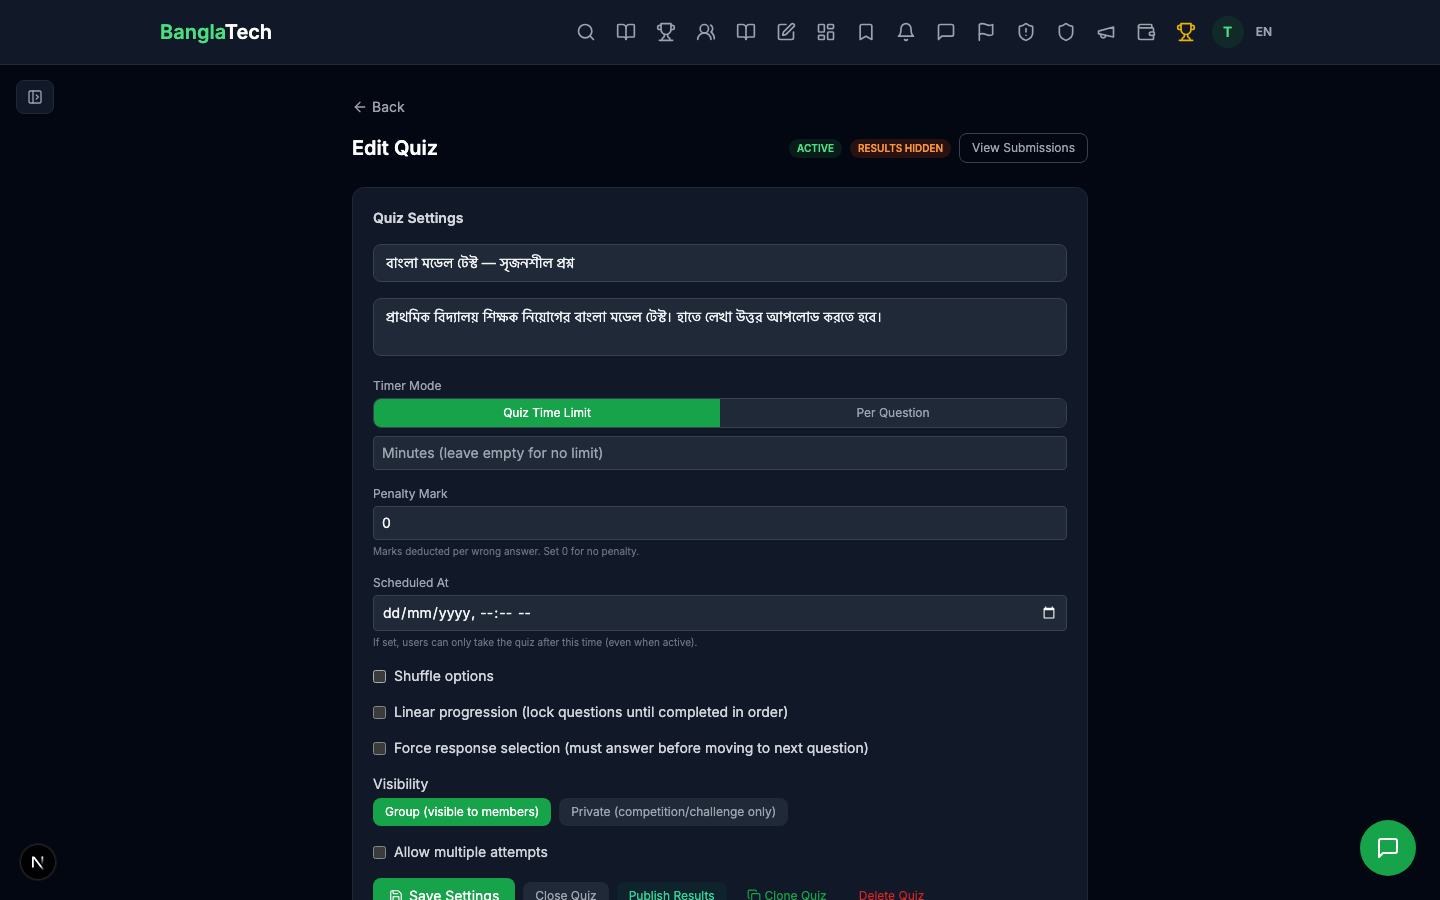
After creating, you land on the quiz edit page where you'll add questions and configure settings.
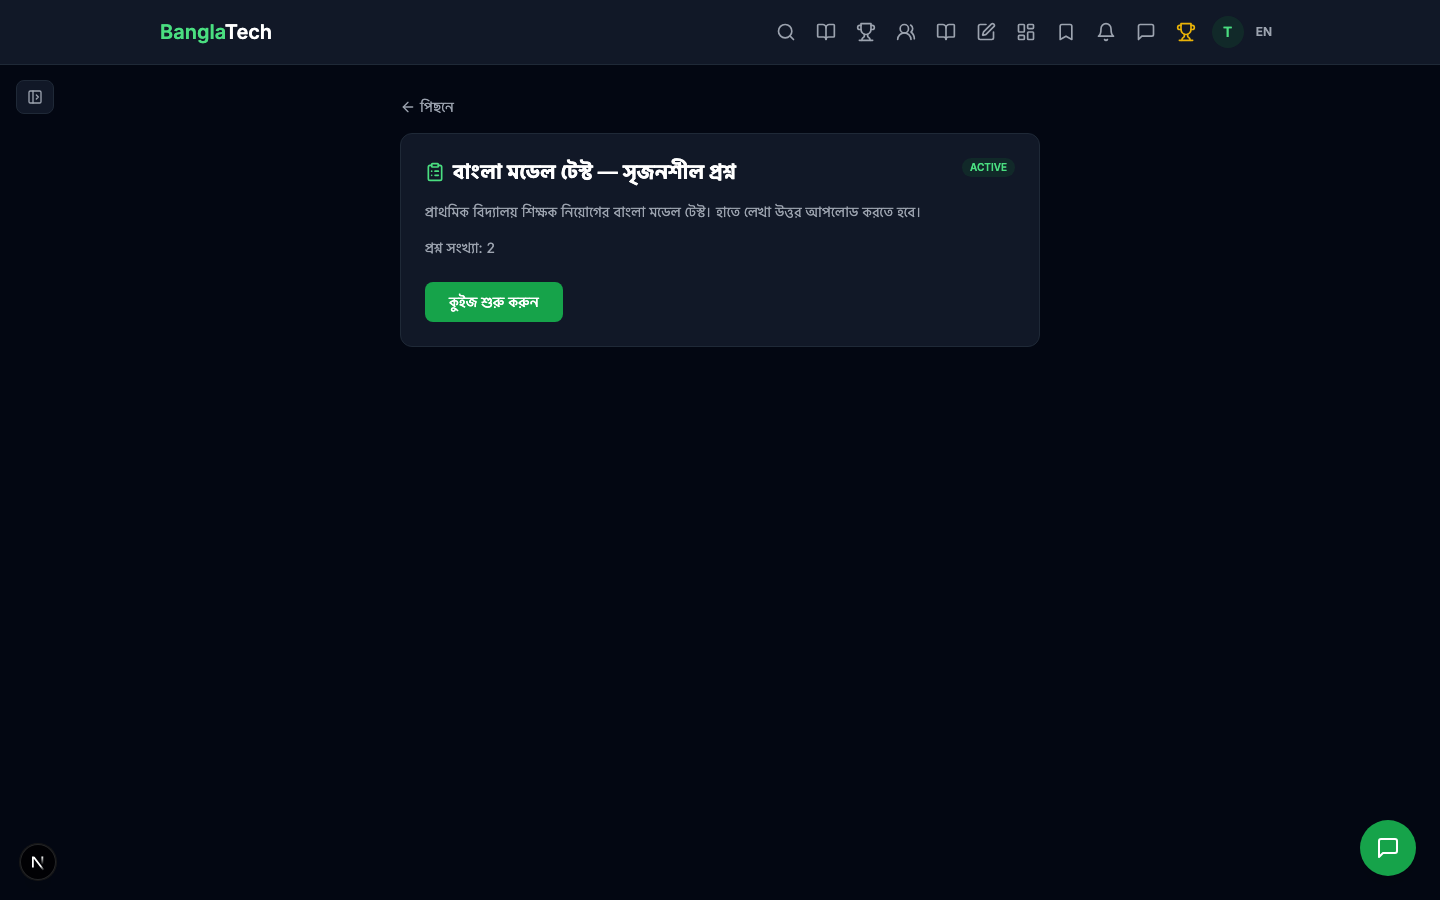
Part 3 — Add CQ (সৃজনশীল) Questions
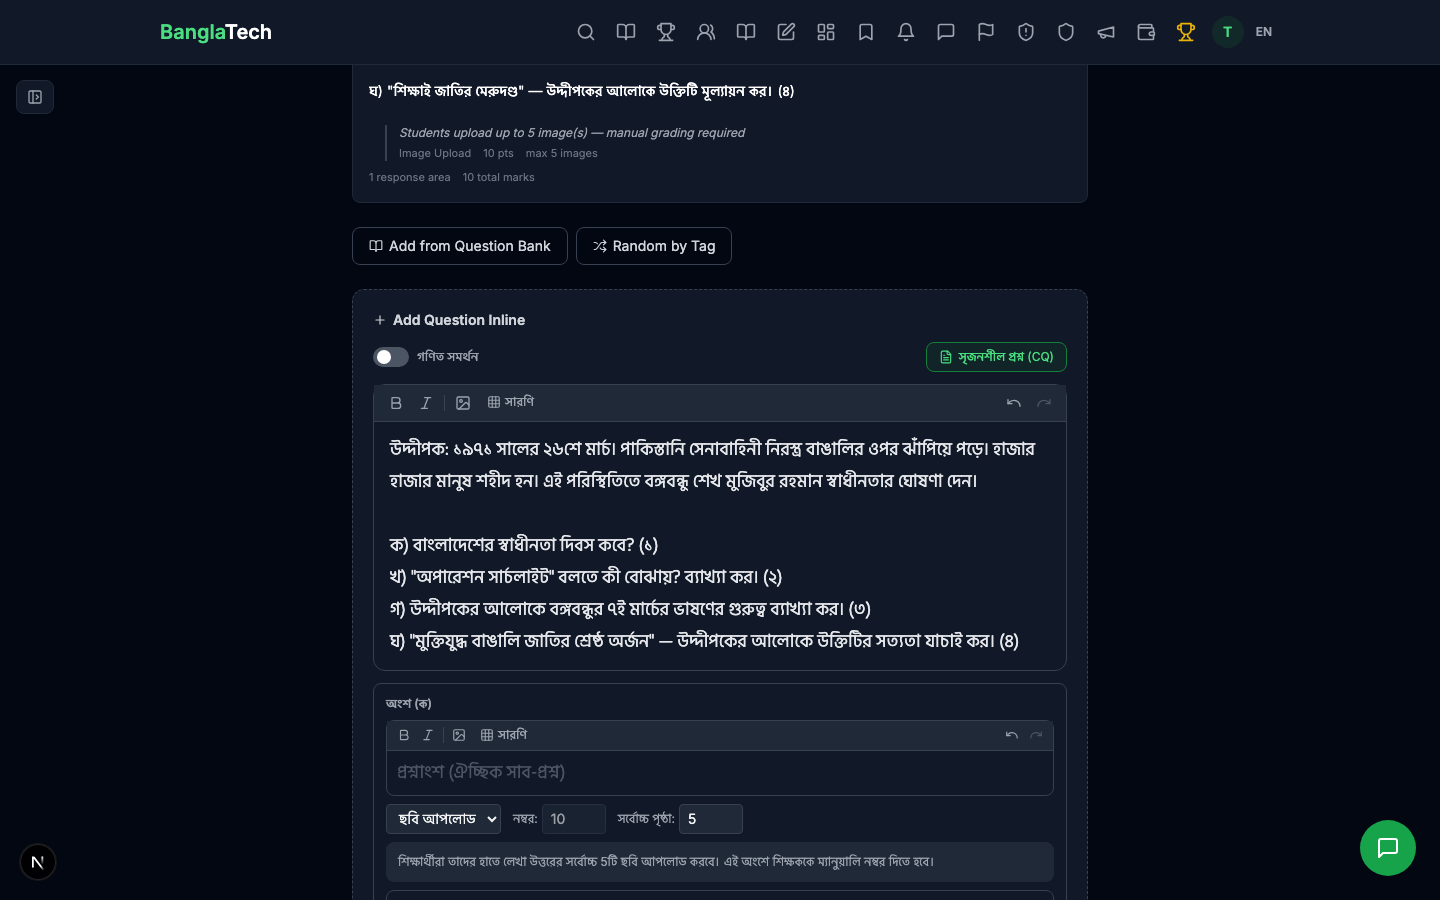
In the Add Question Inline section, look for the সৃজনশীল প্রশ্ন (CQ) button next to the Math toggle. This loads a ready-made template for creative questions.

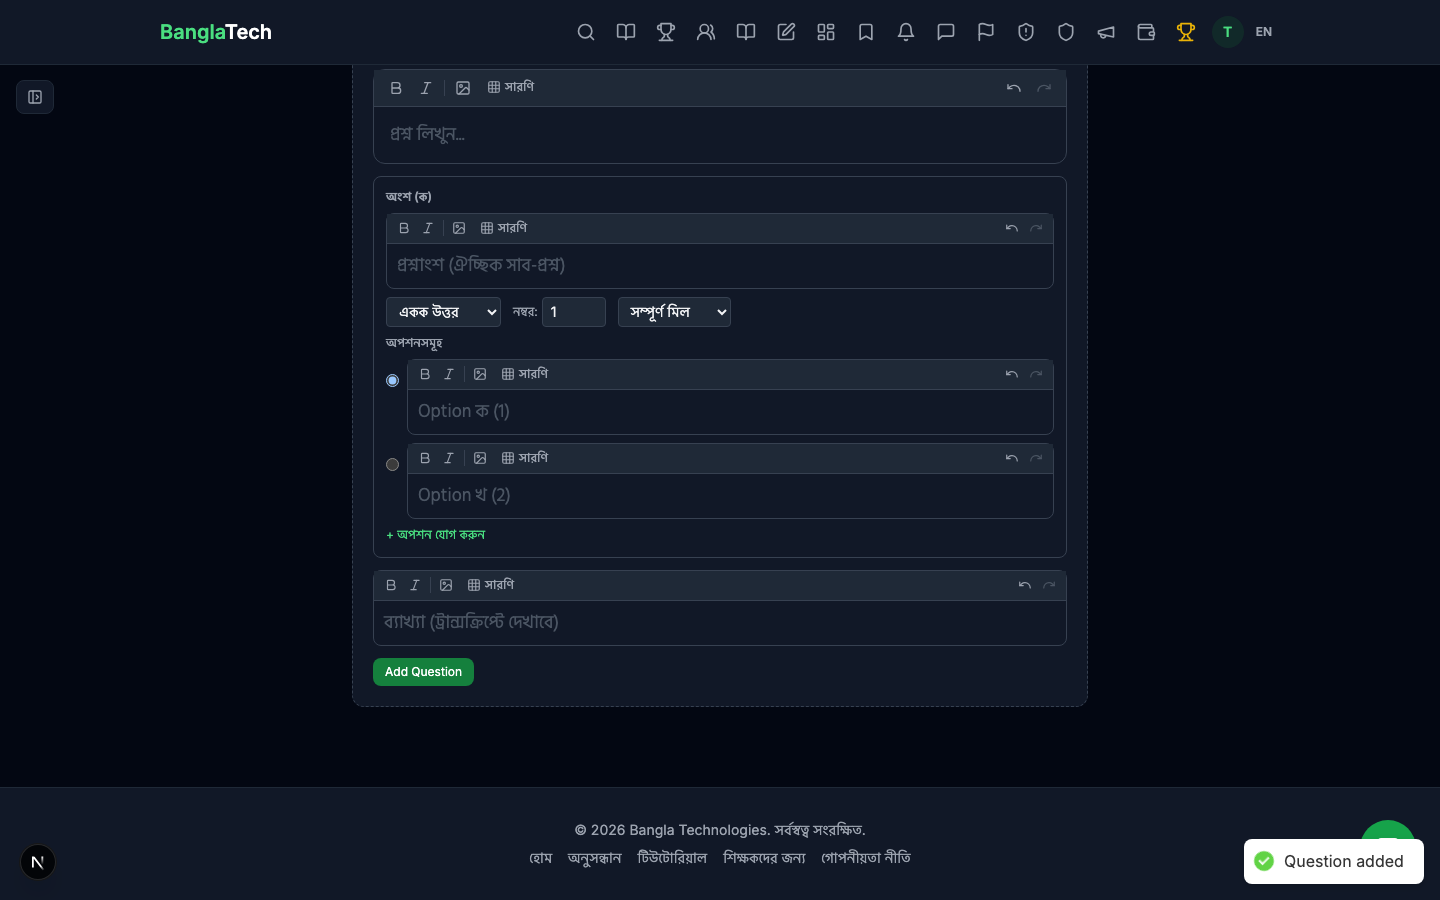
Clicking it creates a single image-upload response area pre-configured with the standard Bangladesh CQ scoring structure: ক=1, খ=2, গ=3, ঘ=4, total 10 marks.
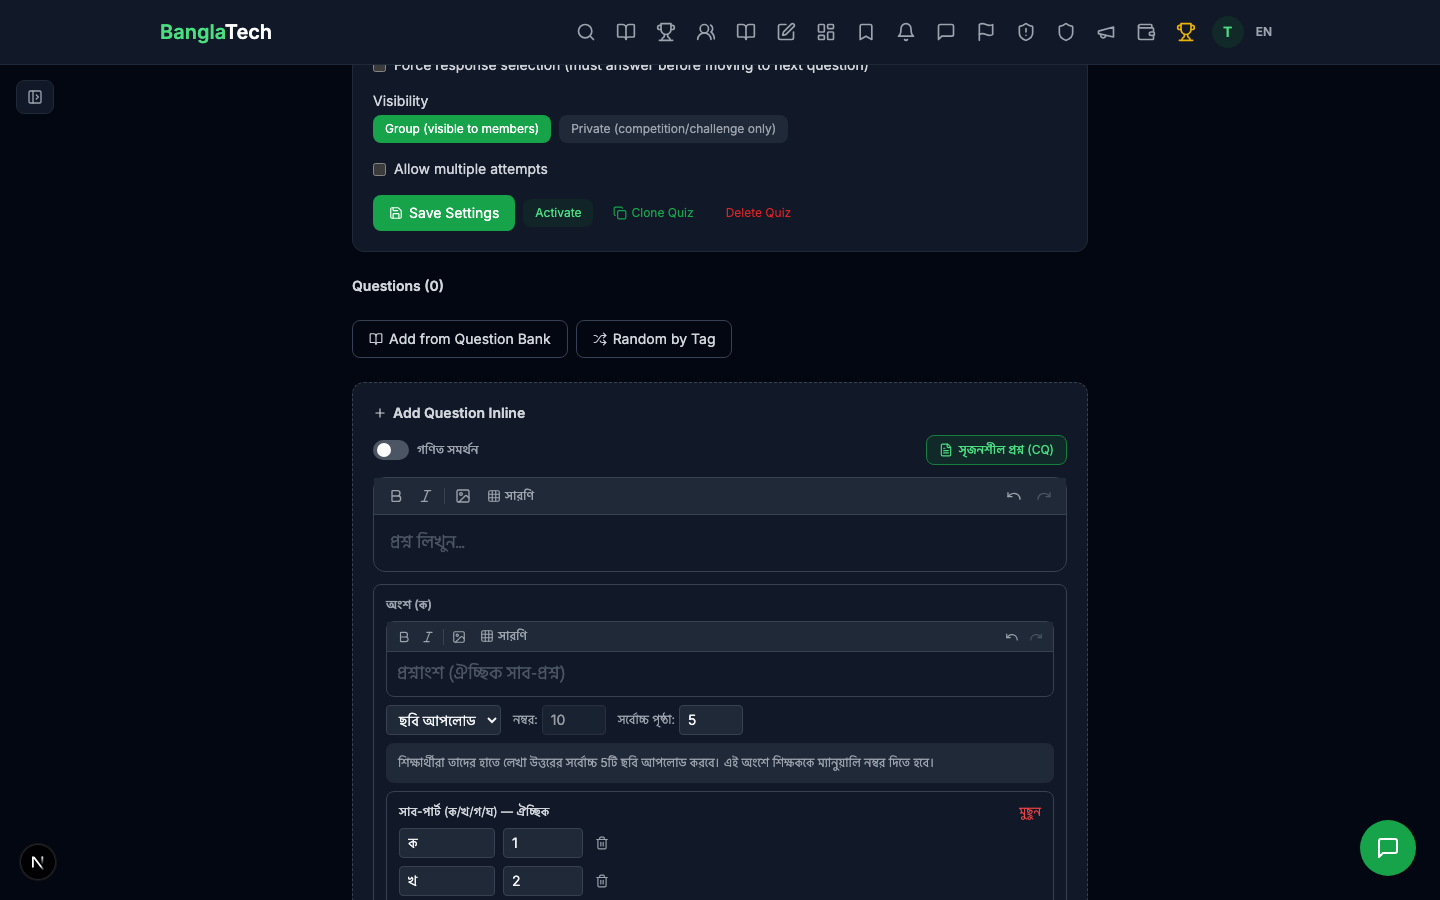
Write the full question in the rich text editor — include the উদ্দীপক (stimulus) followed by ক/খ/গ/ঘ sub-questions. Students will see this as one combined prompt.
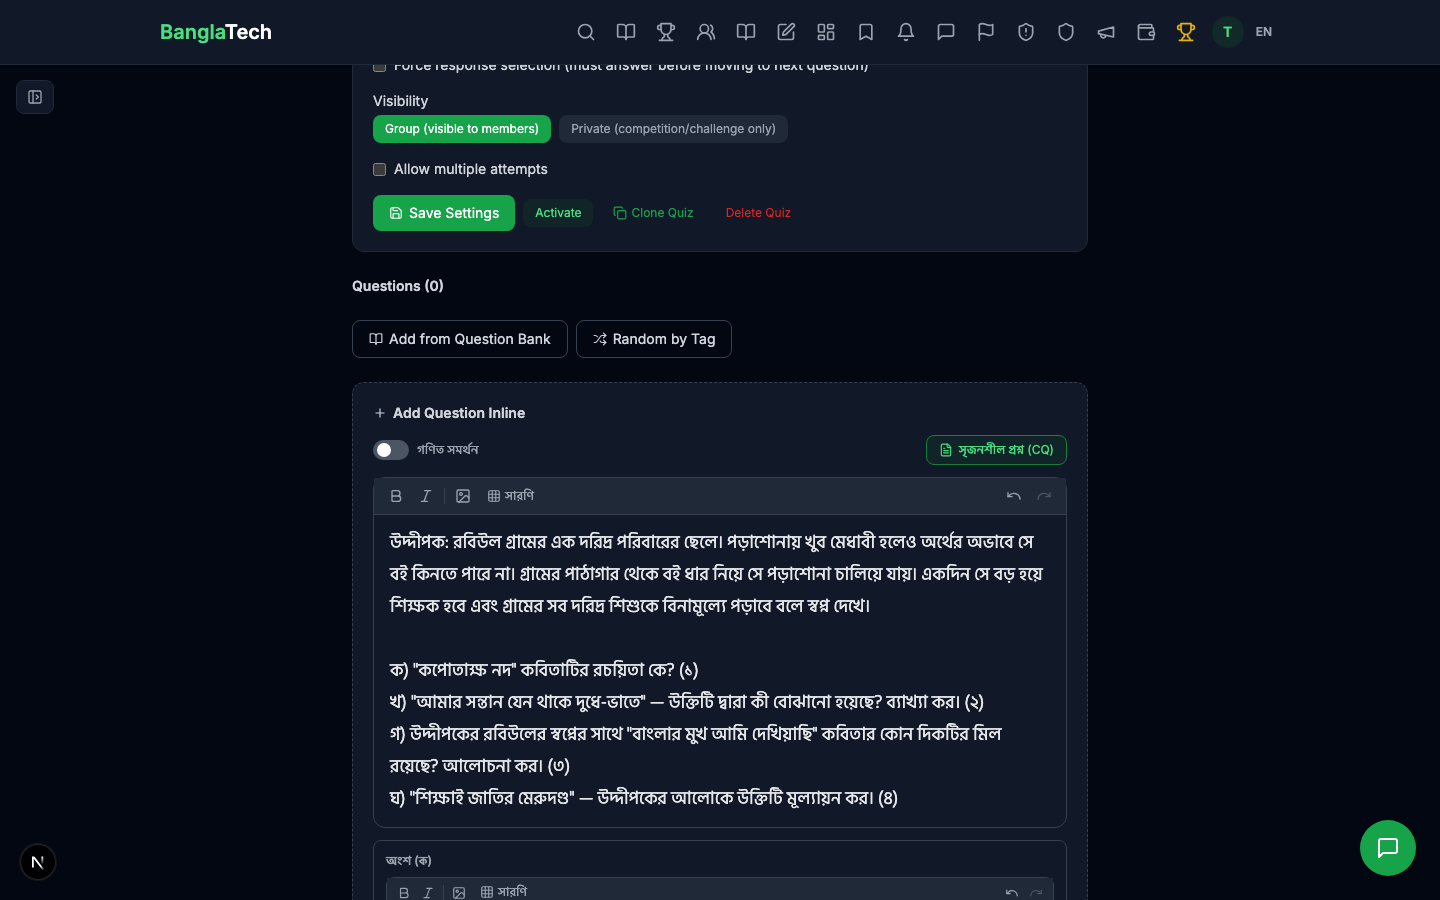
Click Add Question — the question gets added to your quiz.
Repeat for a second CQ question. Click the CQ template button again, write the new উদ্দীপক + sub-questions, and save.
The default template uses ক/খ/গ/ঘ with 1/2/3/4 marks. If your exam uses a different structure, you can edit the sub-parts directly in the question editor — add/remove parts, rename them, or change max marks per part. The total is auto-summed.
Part 4 — Activate the Quiz
Switch the quiz status to Active so students can access it.
Part 5 — Student: Join & Take the Exam
Share the group link with your students. When they open it, they see the group join prompt.
After joining, the exam shows up in the quizzes list.
Opening the quiz shows the intro. Students click Start to begin.
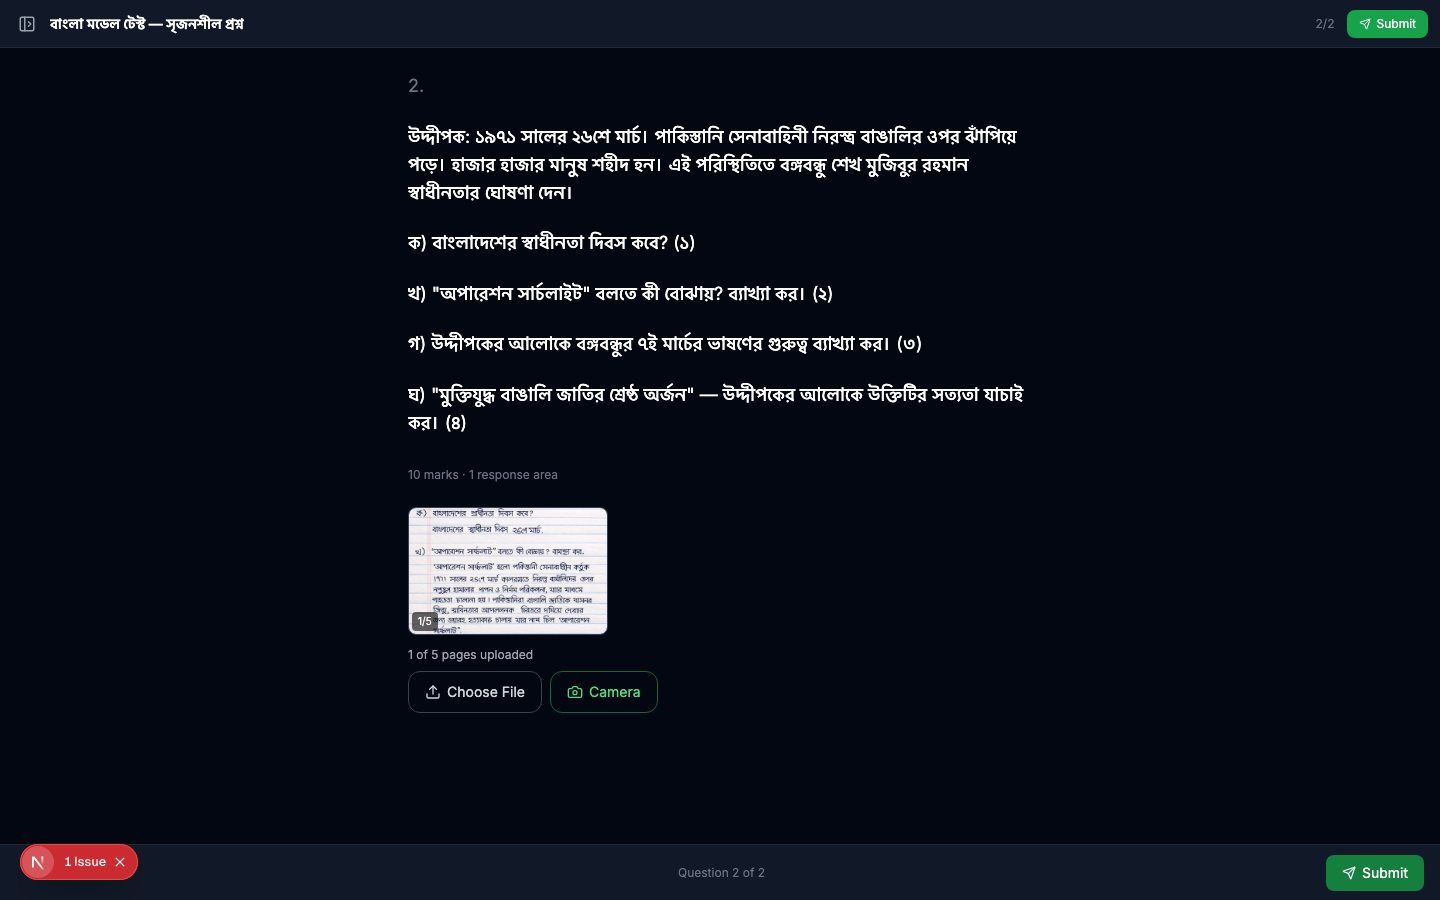
Each CQ question displays the full stimulus + sub-questions. Below the prompt is an image upload area where students upload photos of their handwritten answer pages (up to 5 pages per question by default).
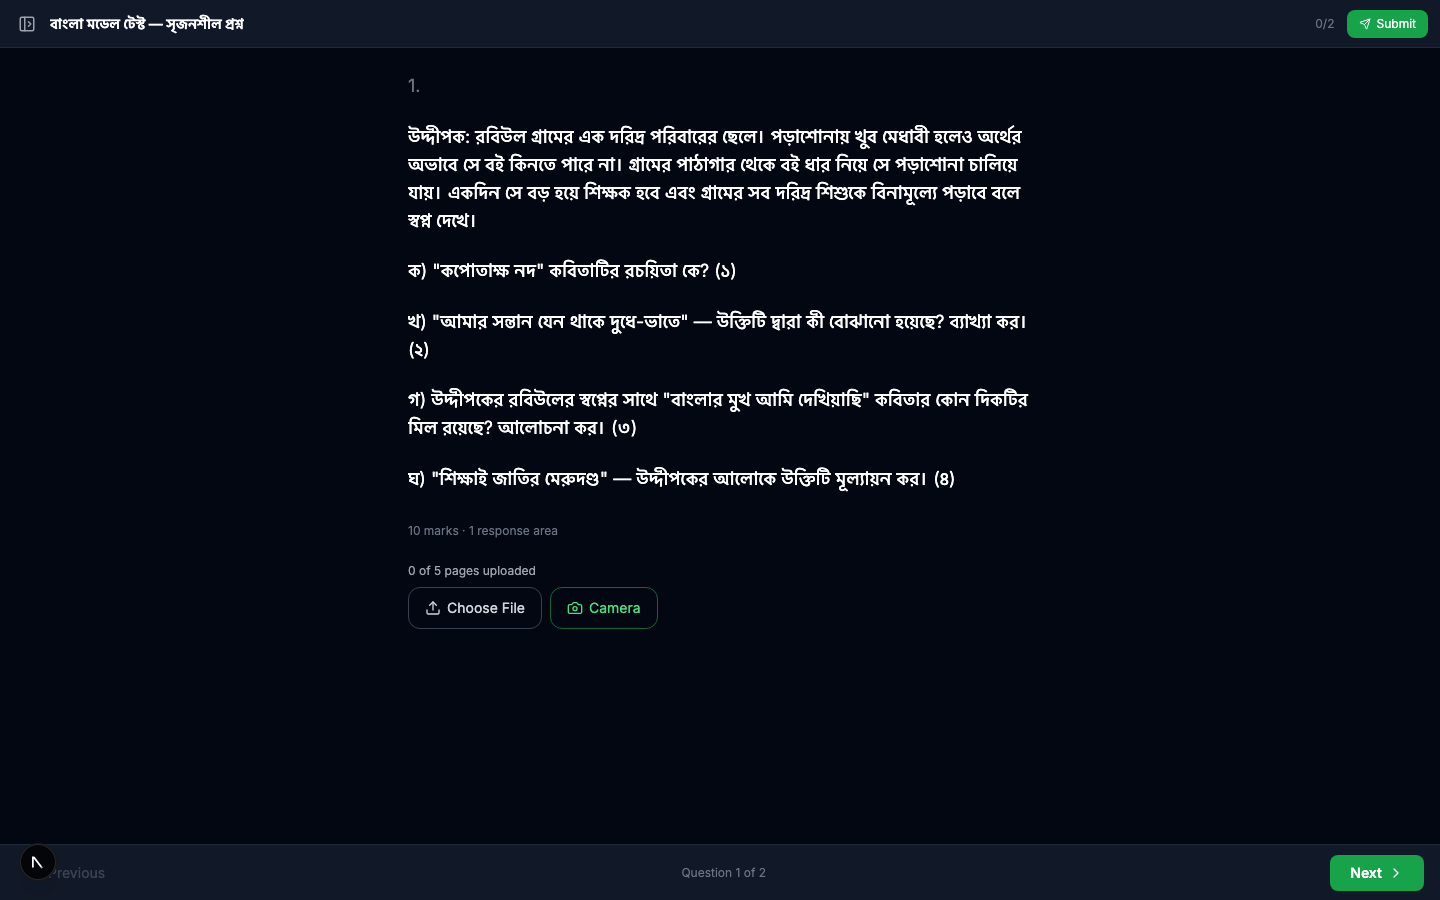
Students snap photos of their answer sheets and upload. The thumbnails appear immediately.
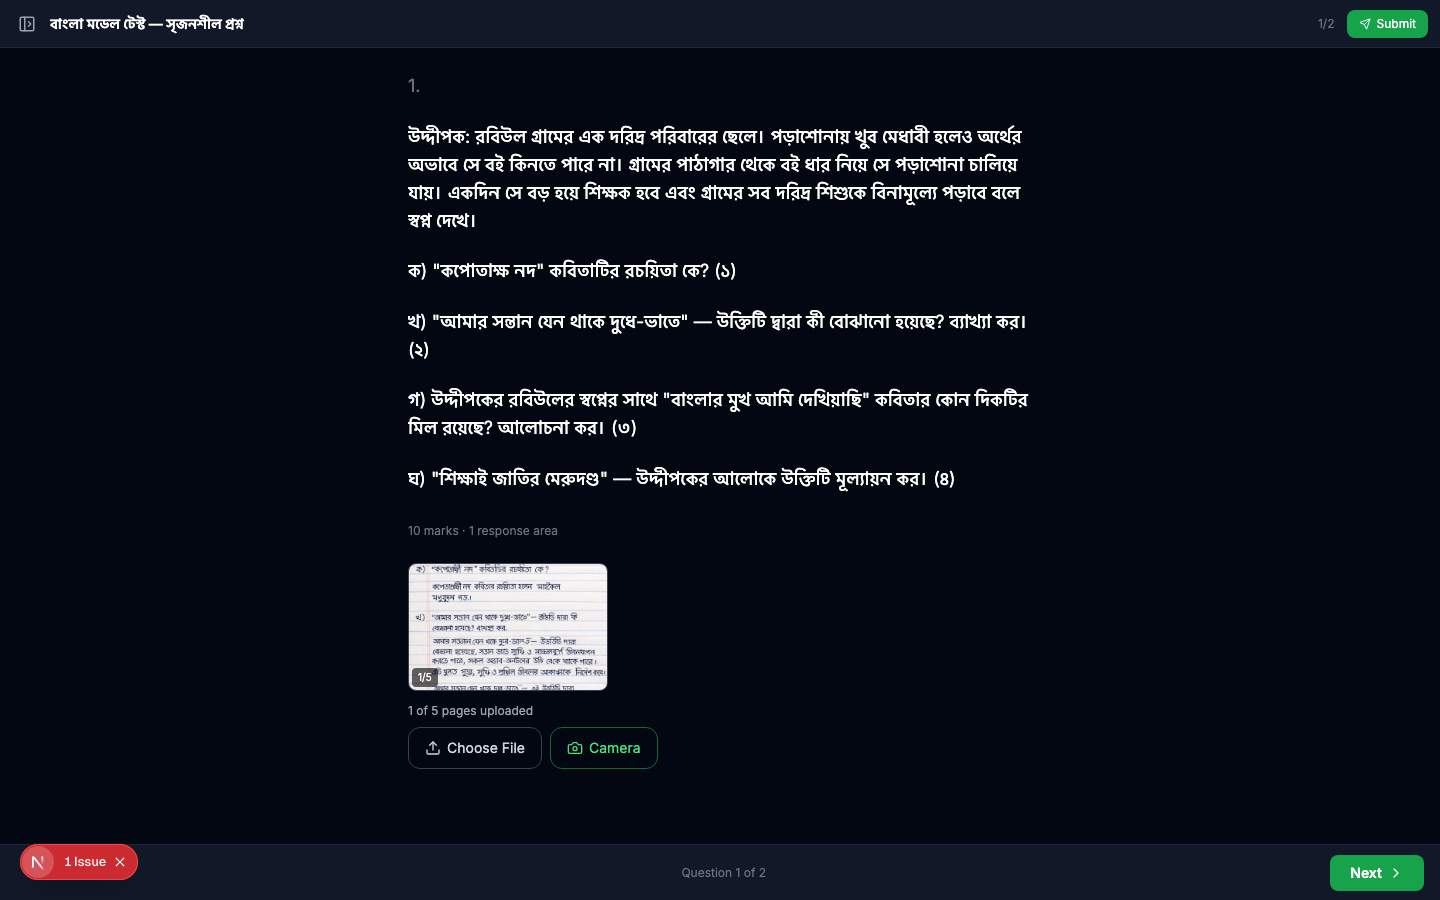
They move to the next question and upload their answer for it as well.
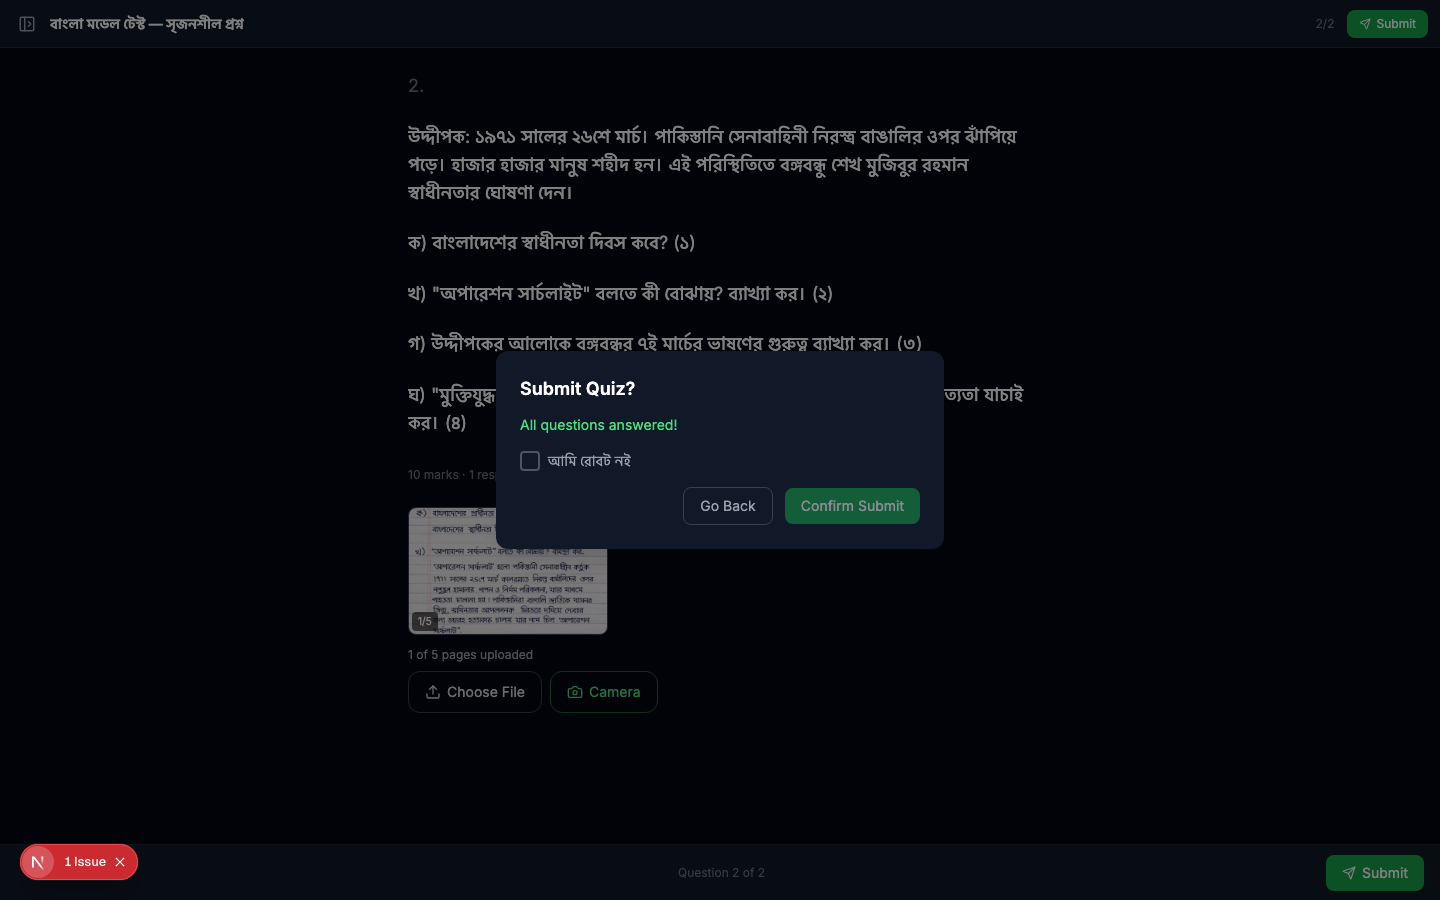
Clicking Submit opens a confirmation modal with a captcha checkbox. Confirm to finalize the submission.
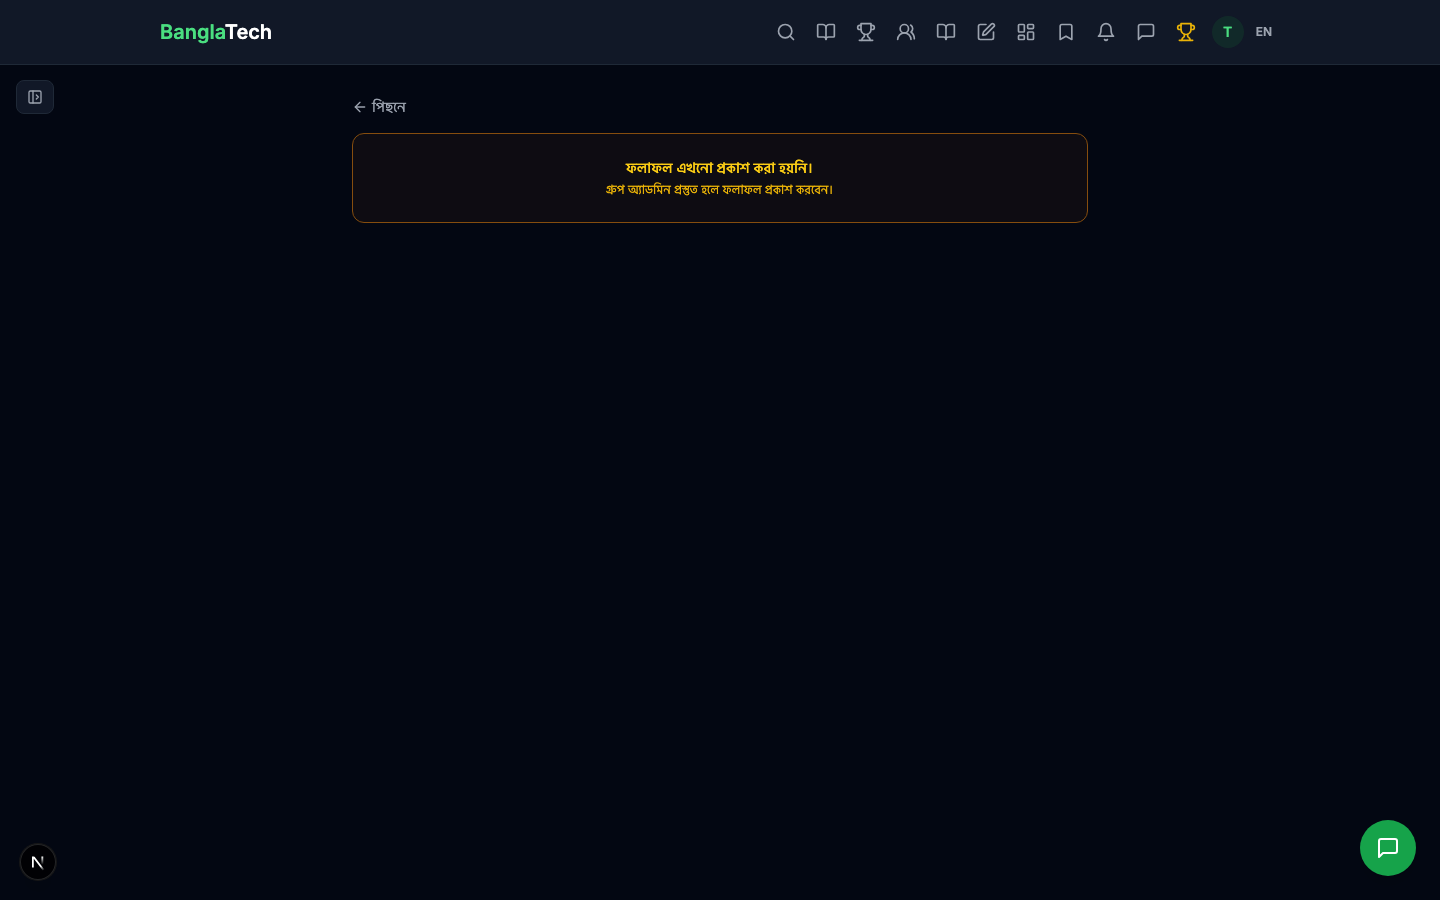
After submission, the student sees a Pending Review state — the teacher still needs to grade the handwritten answers.
Part 6 — Teacher: Grade the Submission
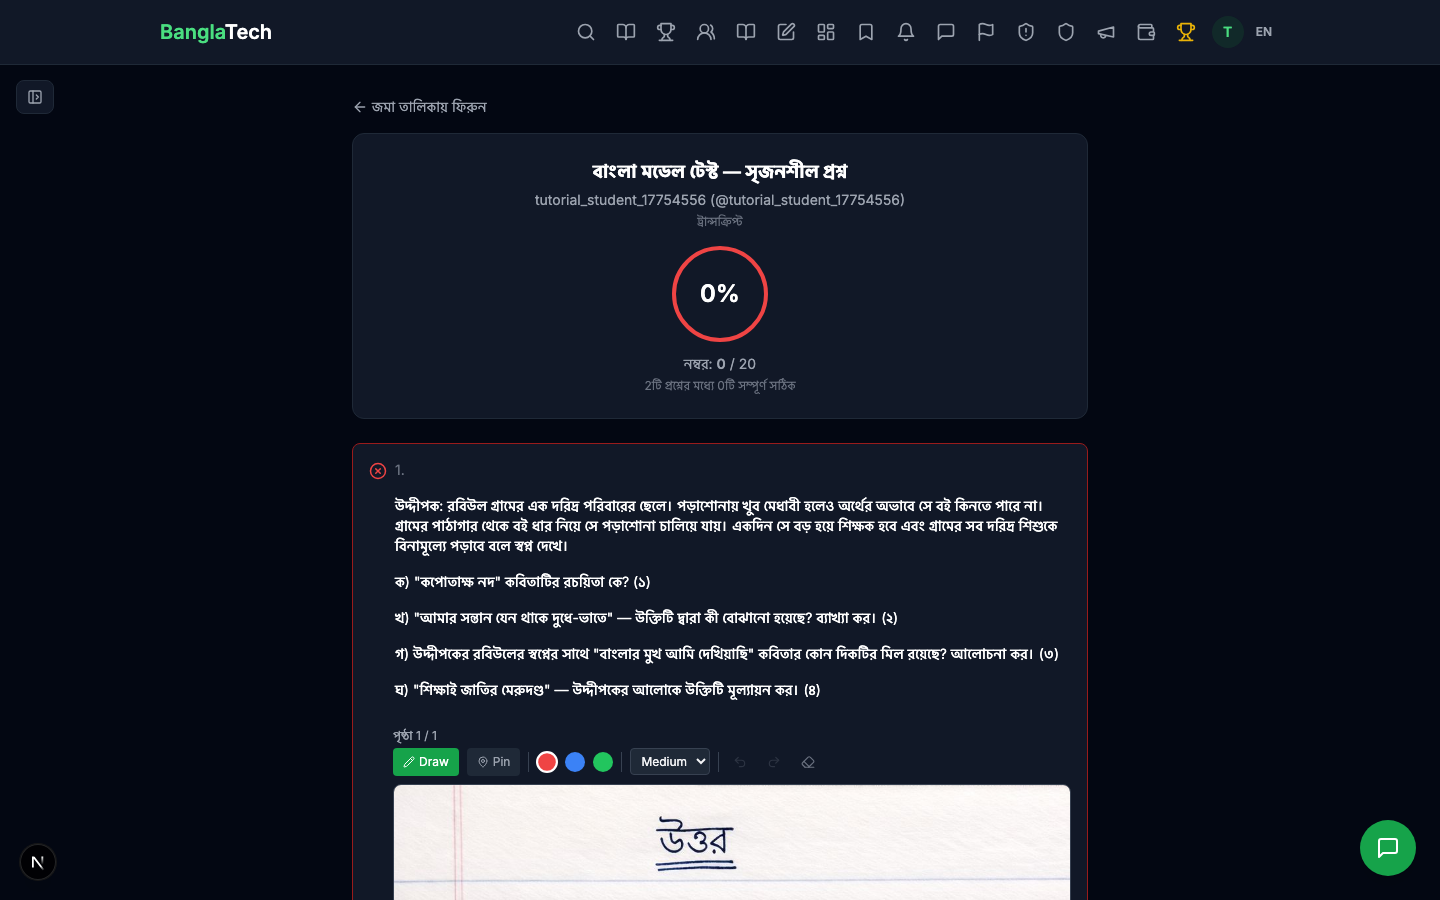
Go to your quiz's Submissions tab. You'll see the student's pending submission.
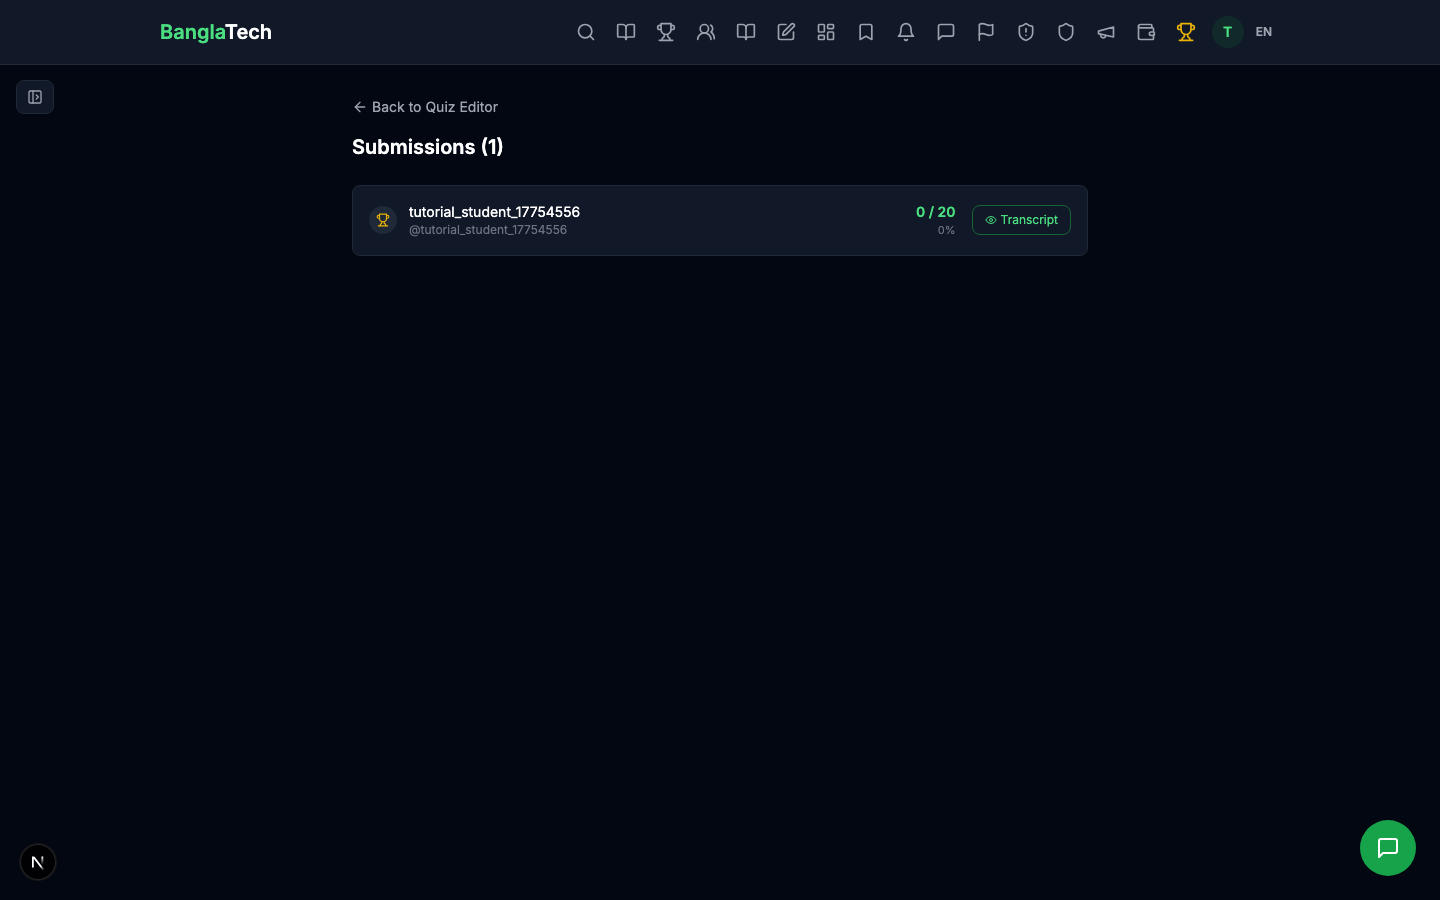
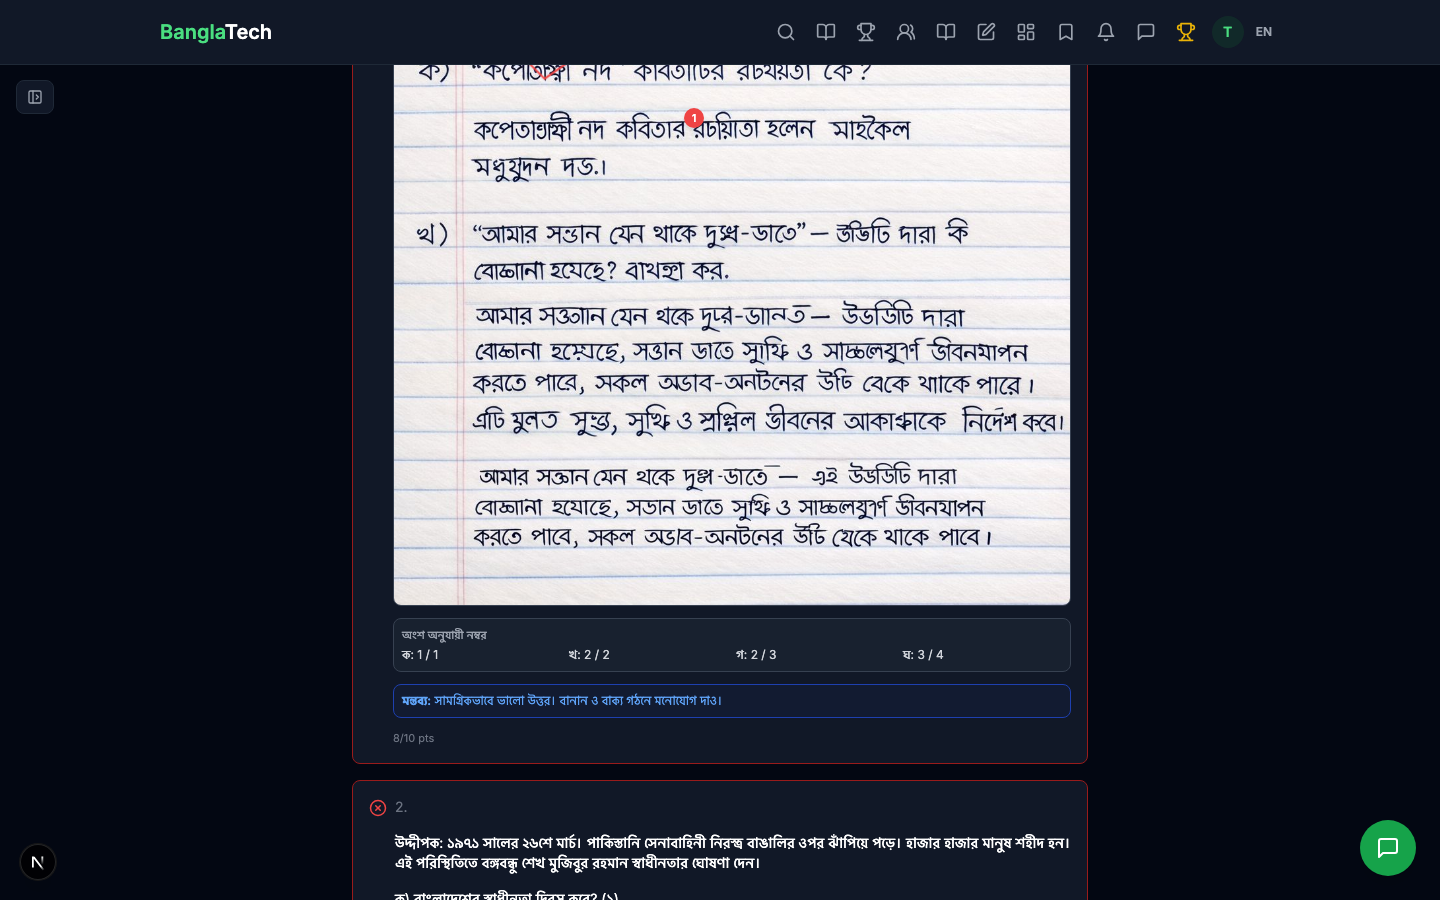
Click the student name to open their transcript. You'll see the uploaded handwritten images for each question, ready for annotation.
Annotation Tools
The image annotator has three main tools:
- Draw — free-hand pen for checkmarks, crosses, underlines, corrections
- Pin — drop a numbered marker at a specific spot and attach a text comment
- Color + stroke width — red/blue/green, thin/medium/thick
- Undo / Redo / Erase last
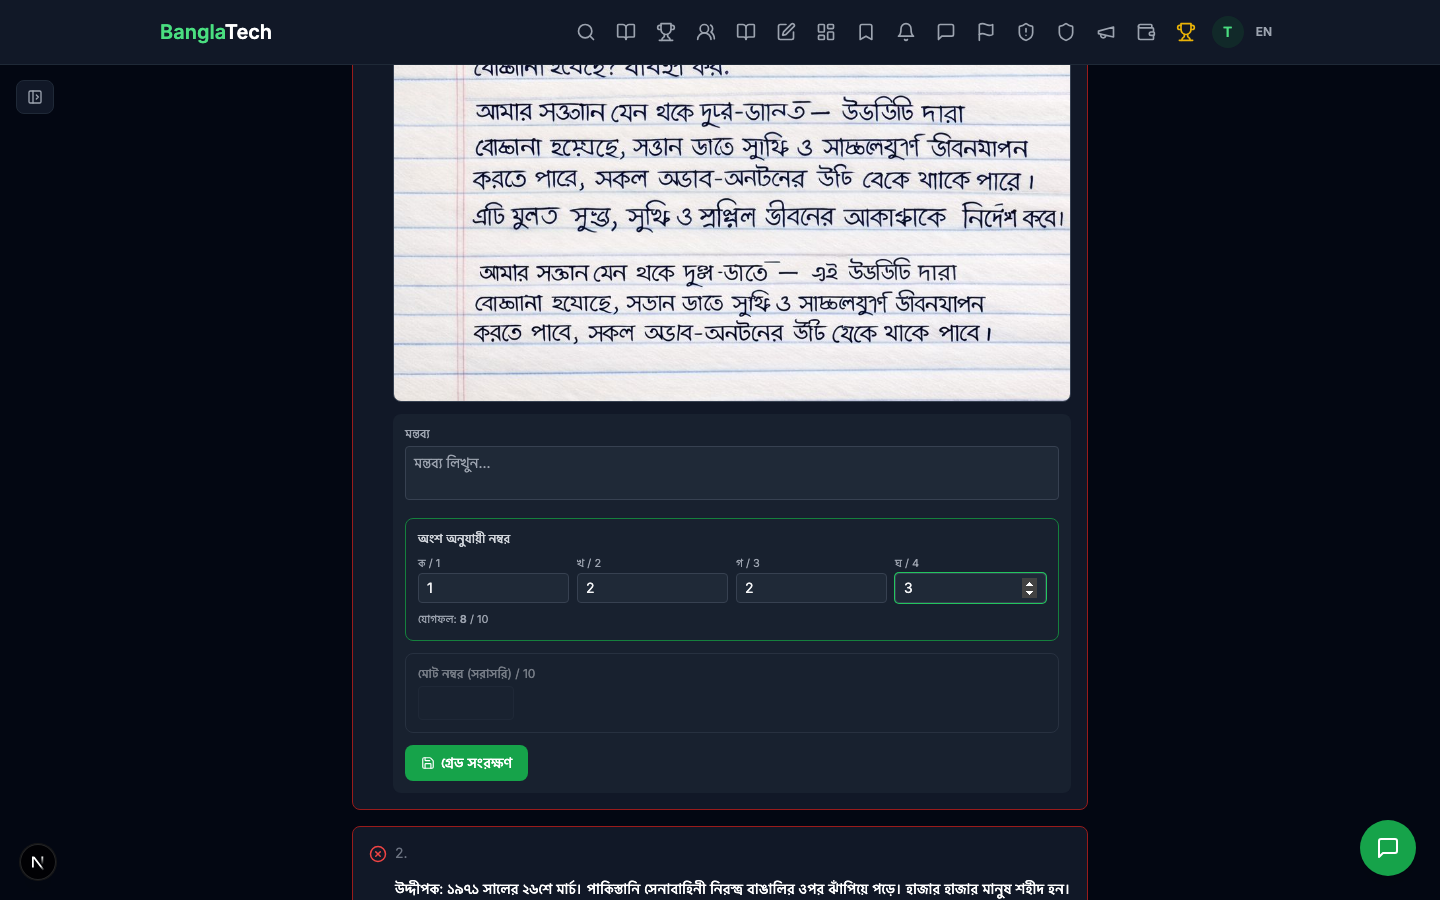
Draw directly on the student's handwriting — circle mistakes, underline key points, write corrections.
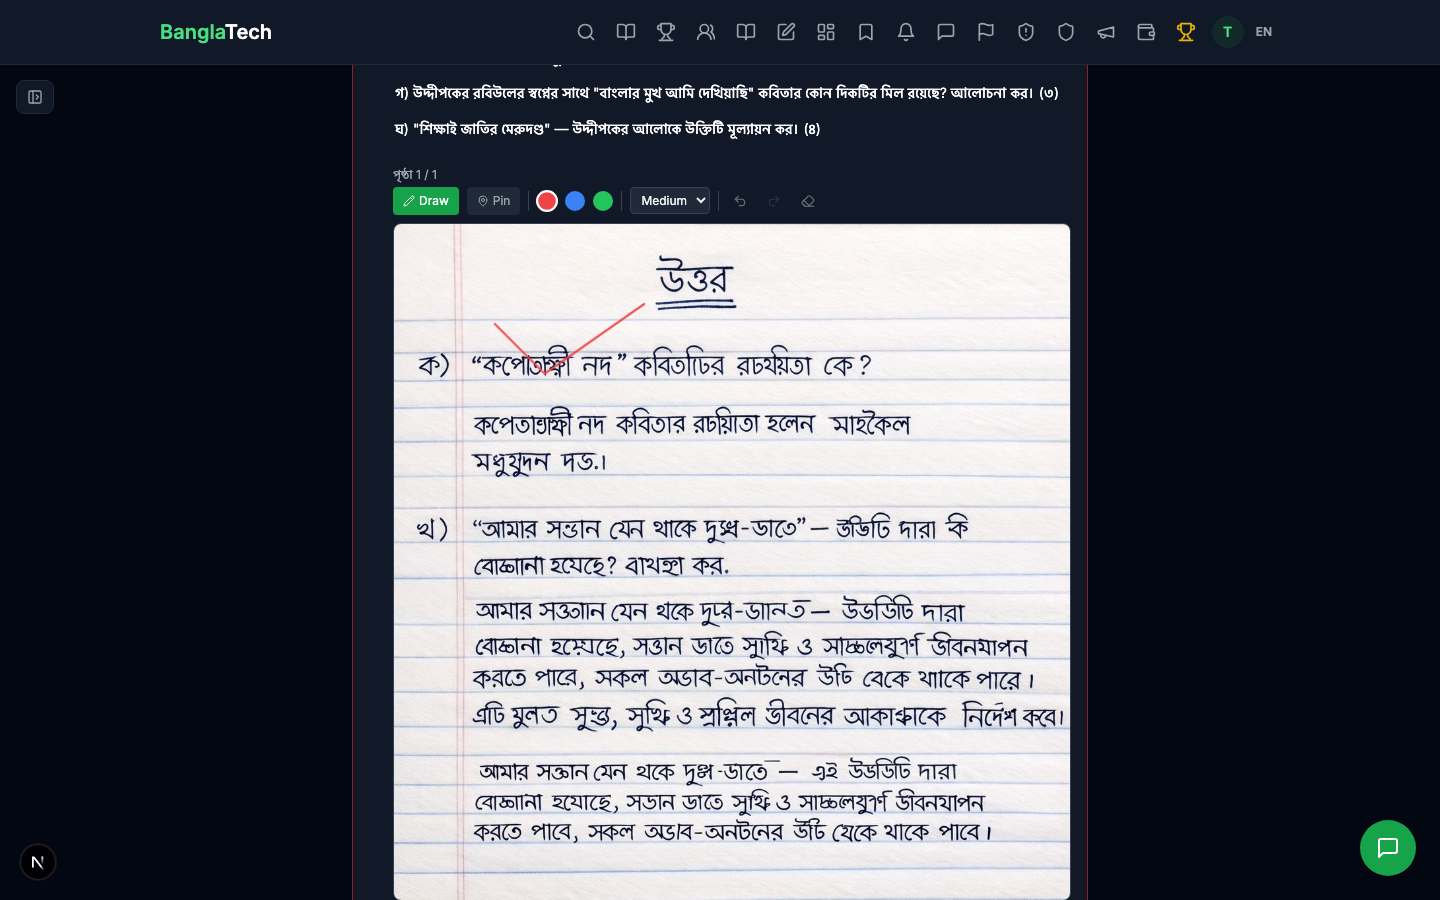
Switch to Pin mode to drop comments at specific spots. A popup lets you type the comment text.
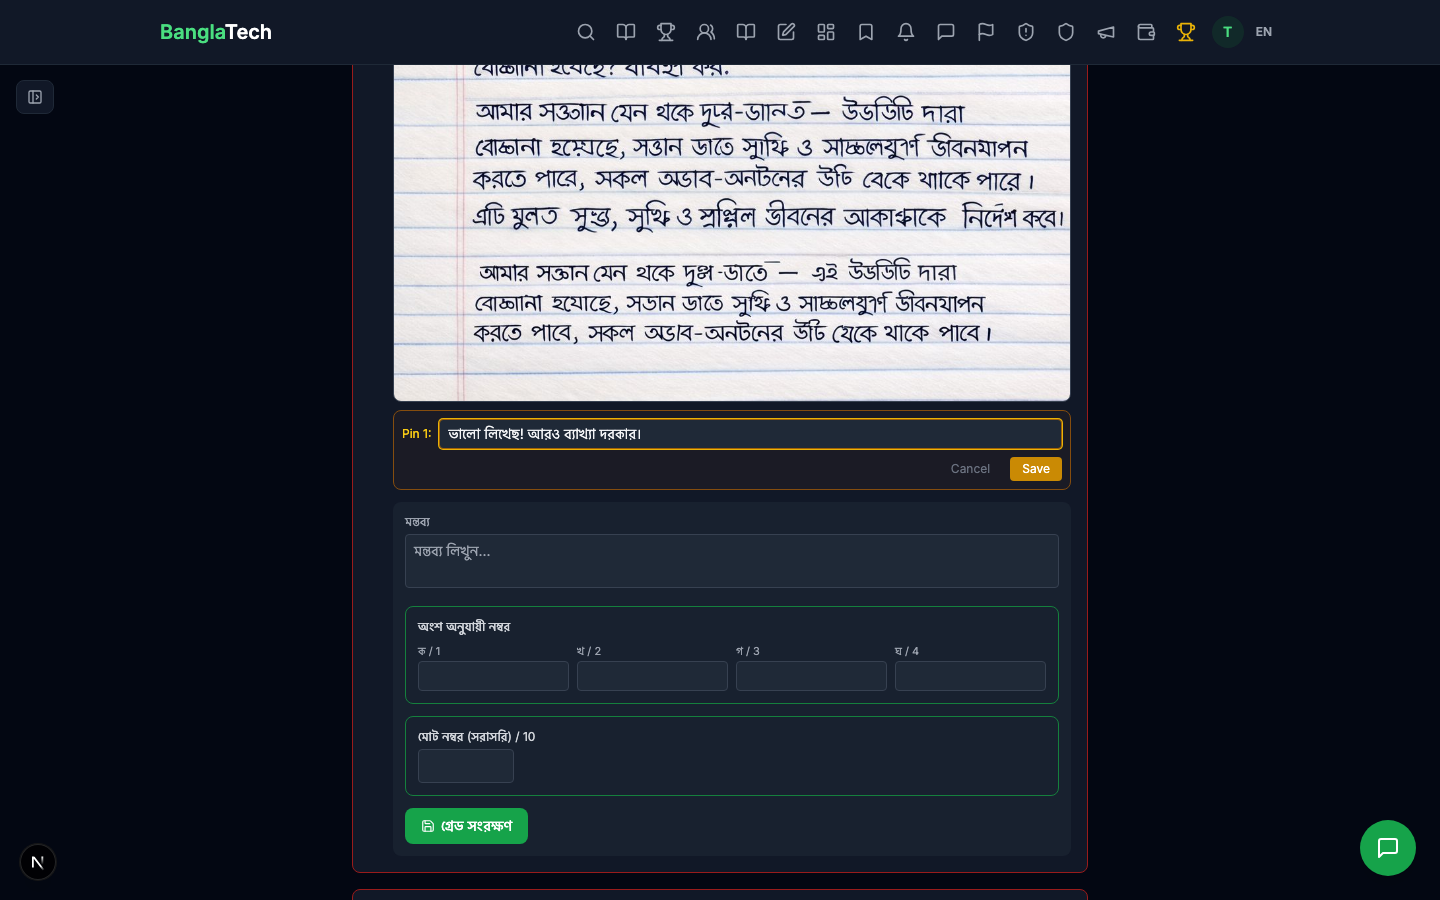
Pins appear as numbered red markers on the image.
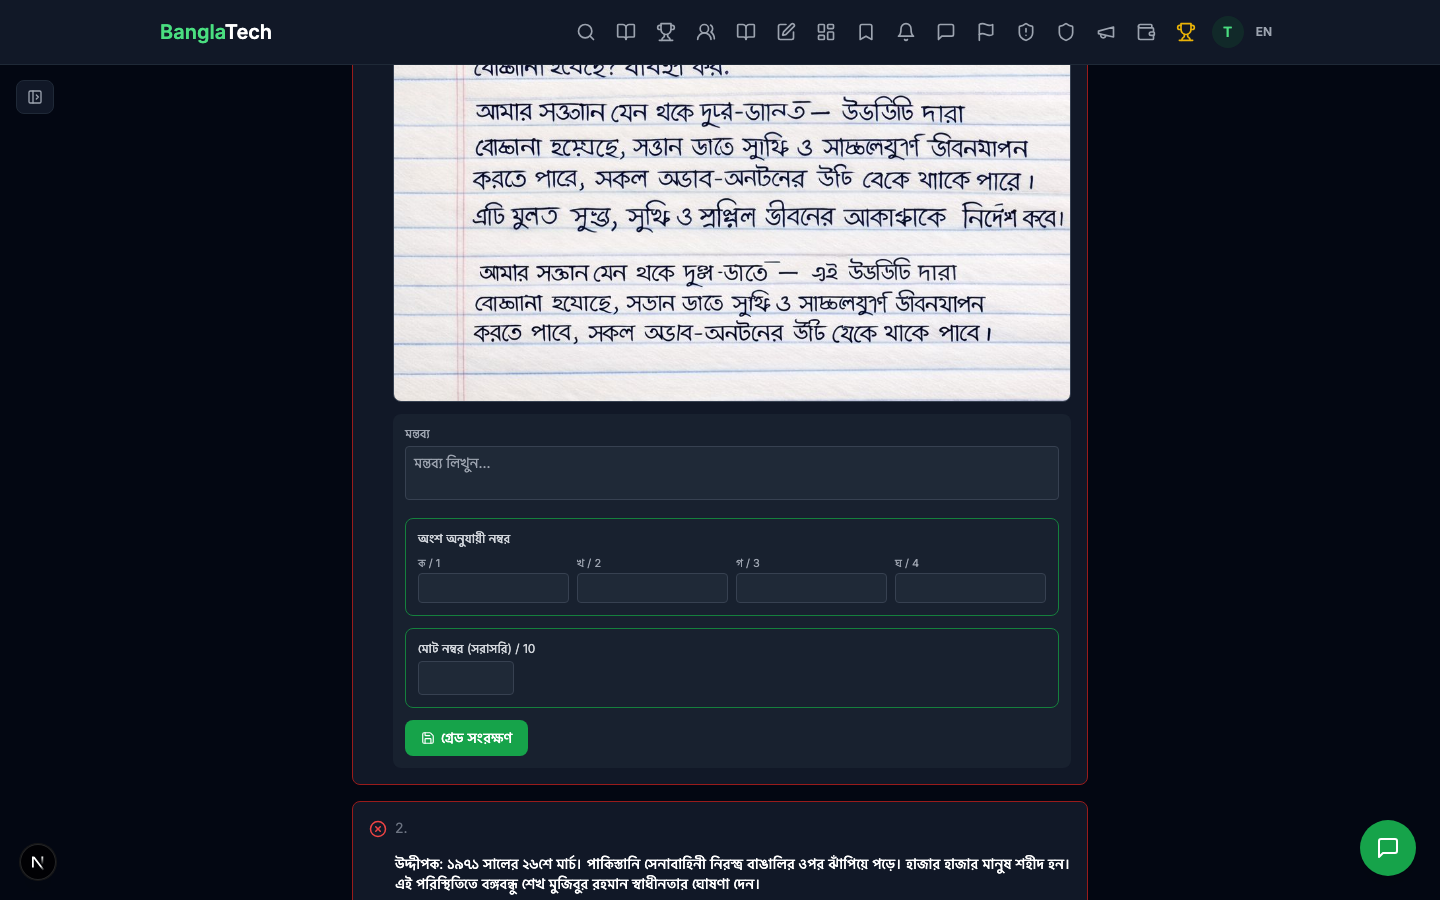
Part-wise Scoring
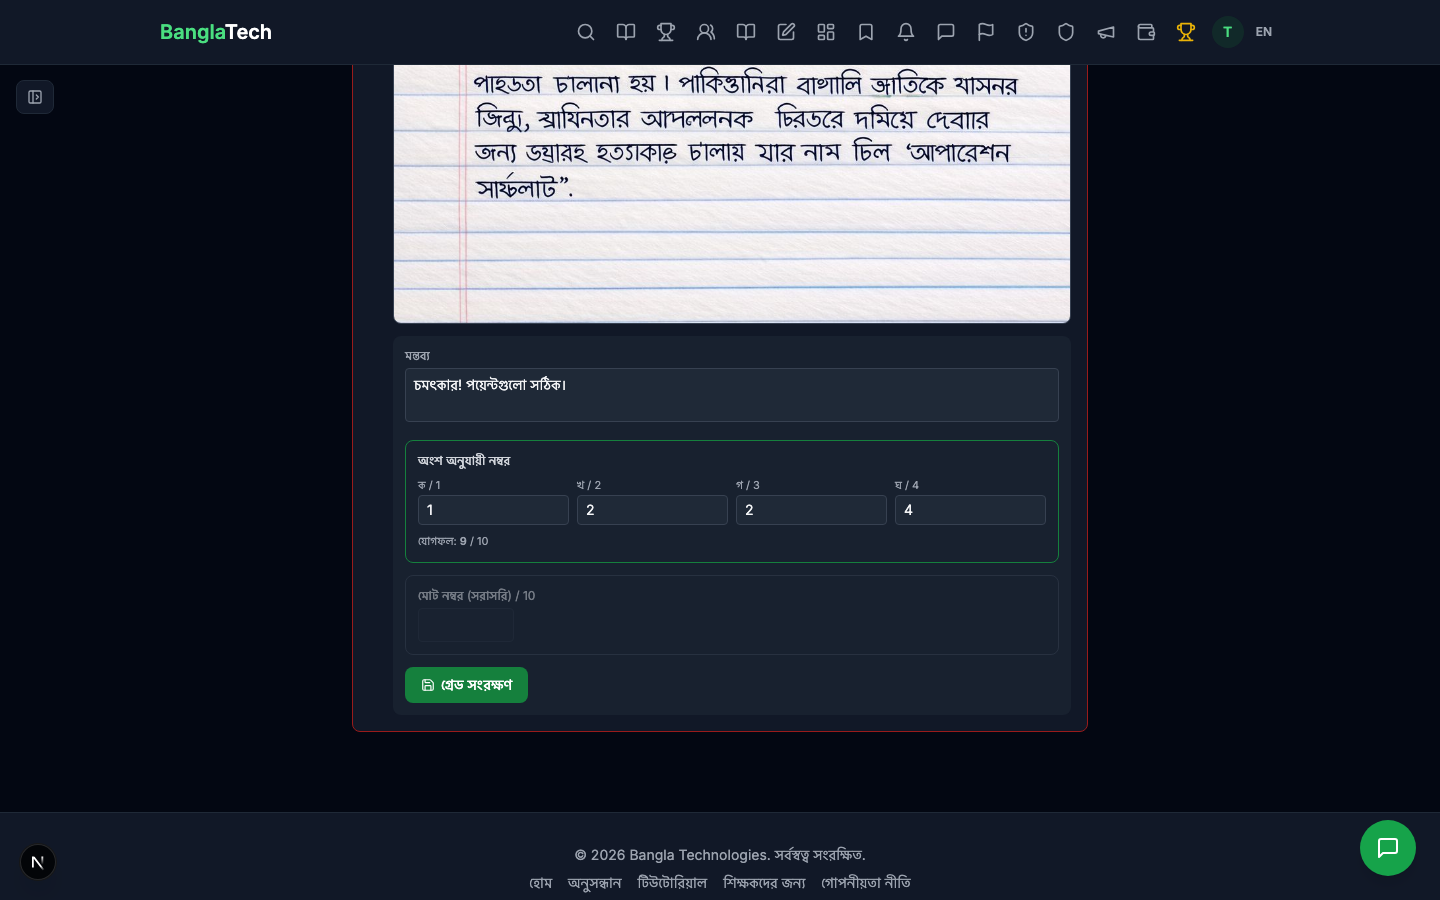
Below the image, enter marks for each sub-part (ক/খ/গ/ঘ). The total is auto-summed. Alternatively, you can enter the total mark directly — the system shows both options and lets you choose.
Entering part marks gives students a detailed breakdown. Entering a single total mark is faster. You can't use both — once you start filling one, the other is disabled (with a confirmation dialog if you want to switch).
Overall Comment
Add an overall comment for the answer — general feedback, suggestions, praise. This shows below the part breakdown on the student's result page.

Save the Grade
Click গ্রেড সেভ করুন (Save Grade) to persist your work. The button changes to "গ্রেড আপডেট" (Update Grade) once saved, and you'll see a success toast.

Repeat the process for the second question (annotate → fill part scores → add comment → save).
Part 7 — Publish the Result
Once all answers are graded, turn on Result Published in the quiz settings. The student can now see their graded transcript.
Part 8 — Student: View the Result
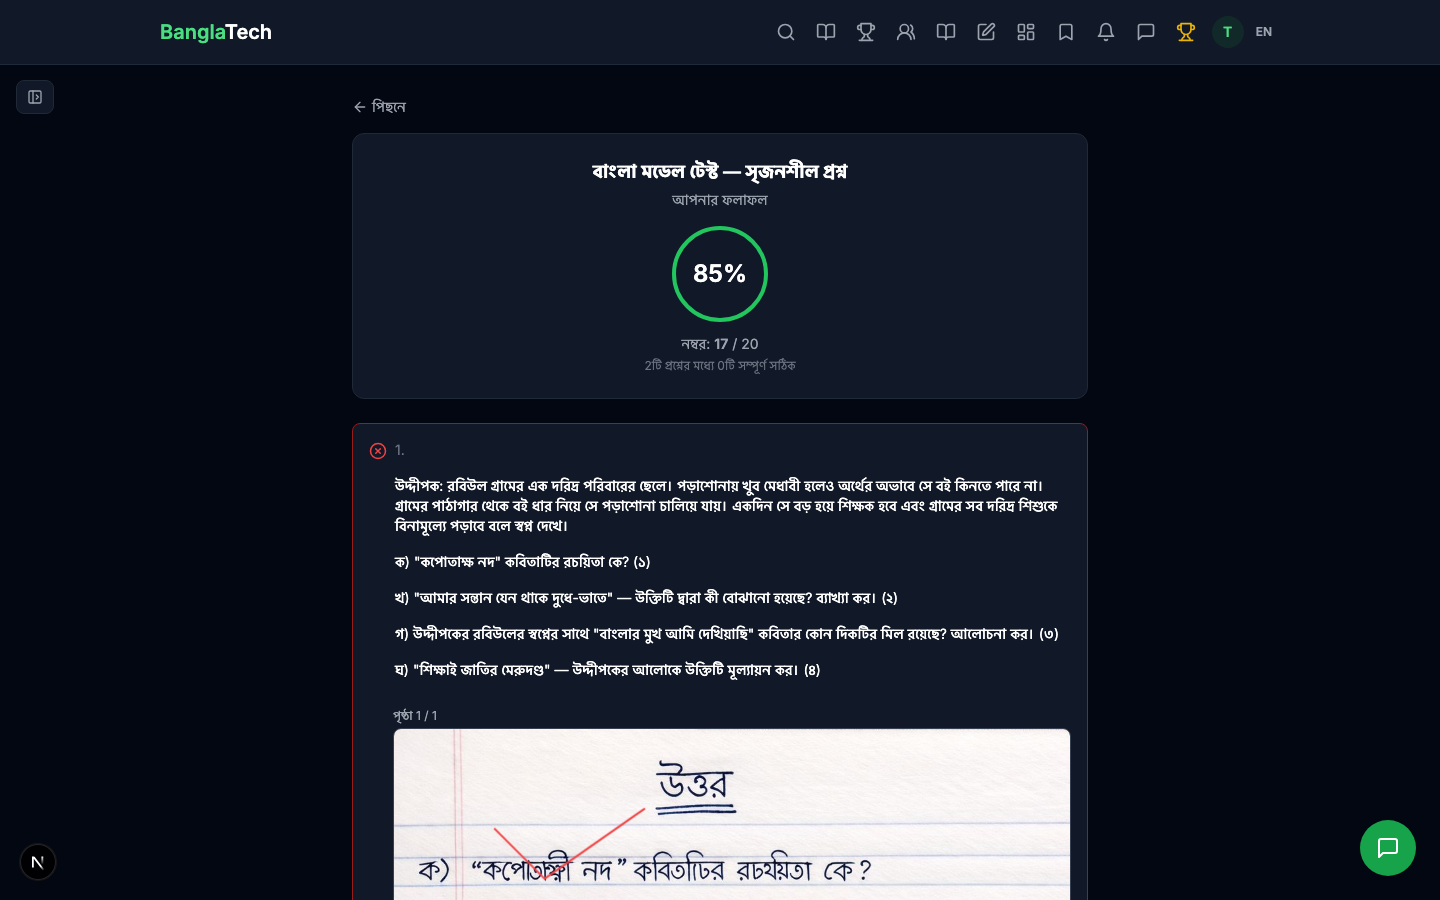
The student opens their transcript and immediately sees the final score with the percentage circle.
Scrolling down, they see their uploaded images — now with the teacher's annotations overlaid (strokes + numbered pins).
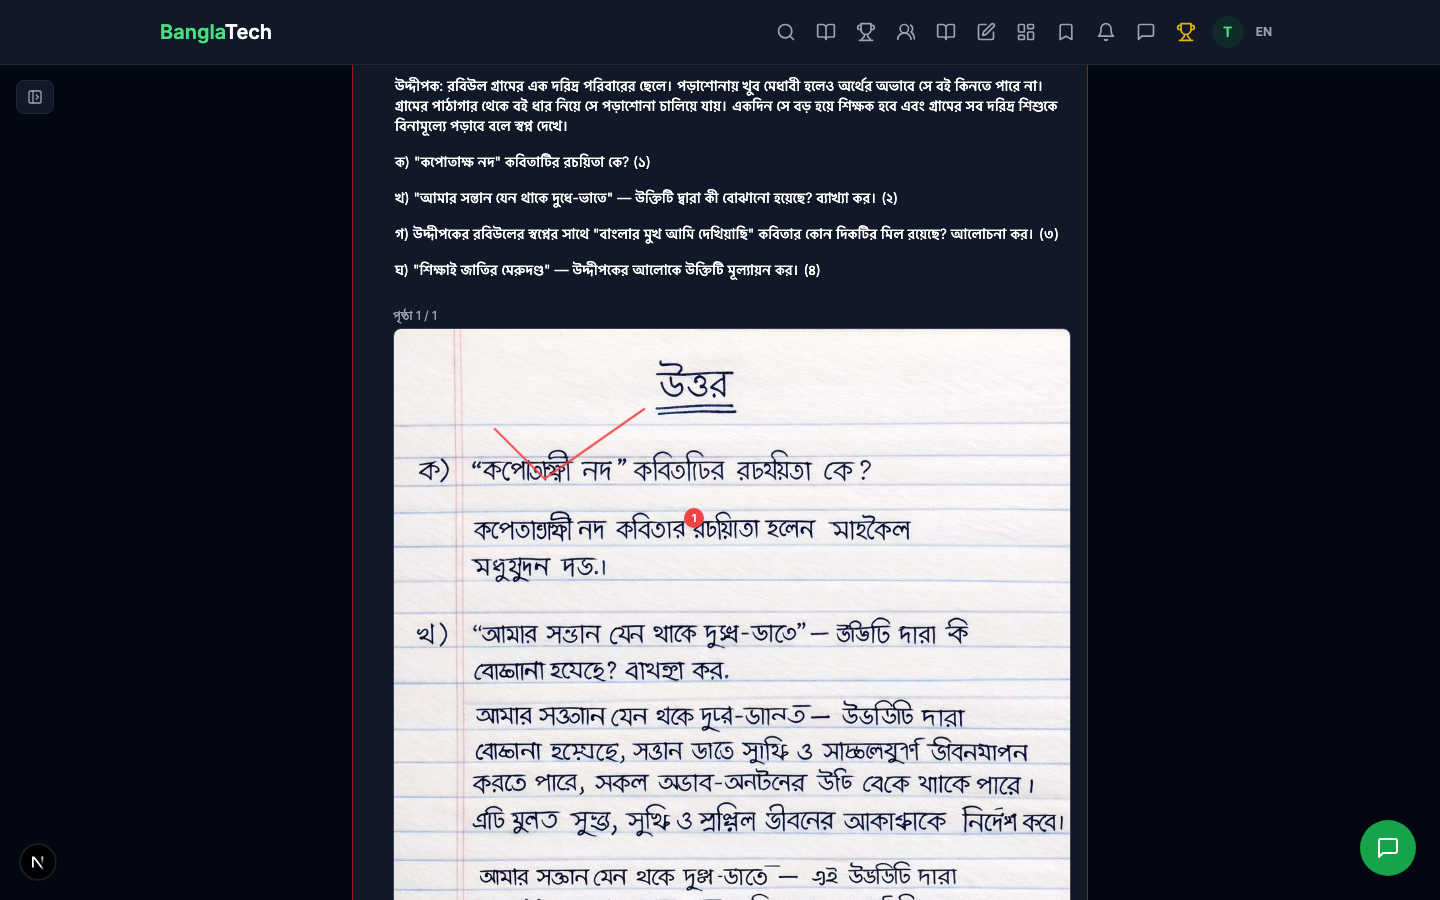
Below the image, the part-wise breakdown shows exactly how many marks were given for each sub-part (ক, খ, গ, ঘ) along with the teacher's comment.
Summary
You now have a complete paper-based exam workflow:
- ✅ Students write on real paper — no screen fatigue, no typing required
- ✅ Photos are uploaded and stored with the submission
- ✅ Teachers annotate directly on the handwriting (like marking a physical paper)
- ✅ Part-wise scoring matches traditional CQ grading conventions
- ✅ Students get a rich, detailed result page with feedback
- ✅ Everything is stored digitally — no lost papers, easy to review later
This workflow works for any handwritten exam format — CQ, short-answer, long-answer, math problems, diagrams. Just set up the sub-parts that match your exam structure, and you're ready.